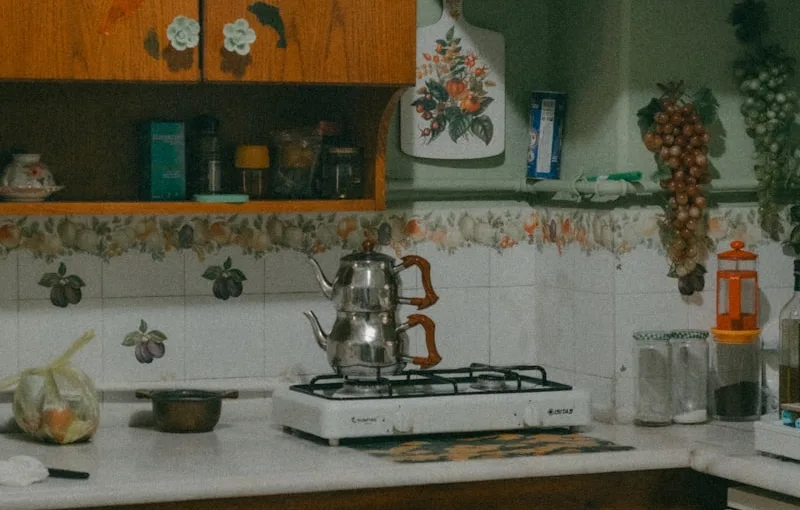
First off, gather your tools. You’ll need a measuring tape, a miter saw, wood glue, and some finishing nails. Think of these tools as your trusty sidekicks, ready to help you transform your kitchen. Measure the areas where you want to add trim—this is crucial! Just like a tailor measuring fabric, precision is key here.
Once you’ve got your measurements, it’s time to cut the trim. Picture this: you’re a sculptor, chiseling away to reveal the beauty beneath. When cutting, make sure to use a miter saw for those perfect angles. It’s like giving your cabinets a stylish haircut—sharp and clean!
Now, let’s talk about attaching the trim. Apply wood glue to the back of the trim pieces and press them firmly against the cabinets. It’s like giving your cabinets a warm hug! For extra security, use finishing nails to hold everything in place. Just be careful not to overdo it; you want your cabinets to look chic, not like they’ve been through a wrestling match.
Finally, don’t forget to paint or stain the trim to match your cabinets. This is where the magic happens! A fresh coat can make the trim pop, adding that wow factor. So, roll up your sleeves and get ready to give your kitchen cabinets the makeover they deserve. You’ll be amazed at how a little trim can make a big difference!
Revamp Your Space: A Step-by-Step Guide to Trimming Kitchen Cabinets
First things first, gather your supplies. You’ll need some sandpaper, paint or stain, a brush, and a little bit of elbow grease. Think of this as your kitchen’s makeover kit—like a beauty routine for your cabinets! Start by removing all the hardware and doors. It’s like giving your cabinets a spa day; they need to be stripped down to shine.

Next, give those surfaces a good sanding. This step is crucial because it helps the paint or stain adhere better. Imagine trying to paint a wall that’s still covered in old wallpaper—it just won’t stick! Once you’ve sanded everything down, wipe away the dust with a damp cloth. You want a clean slate for your masterpiece.
Now, it’s time to choose your color. Are you feeling bold with a vibrant hue, or do you prefer a classic white? Whatever you choose, apply your paint or stain evenly. Think of it like frosting a cake; you want it smooth and deliciously appealing. Allow it to dry completely before reattaching the doors and hardware.
Finally, step back and admire your work! Your kitchen cabinets will look like they’ve just stepped off the showroom floor. Revamping your space doesn’t have to be daunting; with a little creativity and effort, you can transform your kitchen into a place that feels fresh and inviting. So, what are you waiting for? Grab those tools and let’s get started!
From Drab to Fab: Transform Your Kitchen Cabinets with Simple Trimming Techniques
Imagine walking into your kitchen and feeling like you’ve stepped into a magazine spread. It’s all about the details, my friend! Adding trim can elevate your cabinets from basic to breathtaking. Think of it like giving your cabinets a stylish haircut—just a little snip here and a little flair there can make all the difference.
Start by choosing the right trim. Crown molding can add a touch of elegance, while beadboard can bring in a cozy, farmhouse vibe. It’s like dressing your cabinets in their Sunday best! Once you’ve picked your trim, it’s time to get to work. Don’t worry; you don’t need to be a DIY expert. With a few tools and a bit of patience, you can easily attach the trim to the top or bottom of your cabinets.
And here’s a pro tip: paint the trim a contrasting color to really make it pop! Imagine a crisp white trim against a deep navy cabinet—it’s like a breath of fresh air. You can also play with textures; a smooth finish can look sleek, while a distressed look can add character.
The Art of Cabinet Trimming: Elevate Your Kitchen’s Aesthetic with These Tips
So, what’s the deal with cabinet trimming? Well, it’s like giving your cabinets a stylish haircut. A well-executed trim can add depth and character, making your kitchen feel more polished and inviting. Think of it as the jewelry that completes an outfit. Whether you’re going for a sleek modern vibe or a cozy farmhouse look, the right trim can tie everything together beautifully.
Now, let’s talk about materials. You’ve got options galore! From classic wood to sleek metal, the choice of trim can set the tone for your entire kitchen. Wood trim offers warmth and a touch of tradition, while metal can bring in a contemporary edge. And don’t forget about color! A pop of contrasting color can make your cabinets stand out like a star on a red carpet.
But here’s the kicker: it’s not just about looks. Proper cabinet trimming can also enhance functionality. Think about it—adding crown molding can create a seamless transition from your cabinets to the ceiling, making the space feel taller and more open. Plus, it can hide any unsightly gaps that might be lurking up there.
DIY Delight: How to Trim Kitchen Cabinets Like a Pro Without Breaking the Bank
First things first, let’s talk tools. You don’t need a fancy toolkit; just grab a few essentials like a measuring tape, a level, a saw, and some sandpaper. Think of these tools as your trusty sidekicks on this DIY adventure. Now, when it comes to trimming, consider adding crown molding or decorative trim. It’s like putting a cherry on top of a sundae—simple yet oh-so-effective!
Before you dive in, measure twice and cut once. It’s a classic saying for a reason! You wouldn’t want to end up with uneven edges that look like a toddler’s art project. Once you’ve got your measurements down, it’s time to cut. Picture this: you’re sculpting a masterpiece, and each cut brings you closer to your vision.
After cutting, it’s all about the finish. Sand those edges until they’re smooth as butter. Then, grab some paint or stain that complements your kitchen’s vibe. This is where you can really let your personality shine! Whether you go for a bold color or a classic wood finish, it’s your chance to make a statement.
Finally, don’t forget to seal your work. A good sealant protects your cabinets from spills and stains, keeping them looking fresh for years. So, roll up those sleeves and get ready to impress your friends with your newfound cabinet-trimming skills!
Cabinet Trimming 101: Essential Tools and Techniques for a Stunning Kitchen Makeover
First off, you’ll want to gather your tools. A miter saw is your best friend here; it’s like the magic wand of woodworking, allowing you to make precise cuts at various angles. Pair that with a nail gun, and you’ll be zipping through your project like a pro. Don’t forget a measuring tape—because let’s be honest, measuring twice and cutting once is the golden rule of DIY. A level is also crucial; you don’t want your beautiful trim to look like it’s been through a funhouse mirror!
Now, let’s talk techniques. Start by prepping your cabinets. Clean them thoroughly and, if needed, sand down any rough spots. This step is like giving your cabinets a spa day before the big makeover. Once they’re prepped, it’s time to measure and cut your trim pieces. Think of this as dressing your cabinets in a stylish new outfit.
When attaching the trim, use your nail gun to secure it in place, ensuring everything is level and aligned. If you’re feeling adventurous, consider adding some decorative molding for that extra flair. It’s like adding a cherry on top of a sundae—totally elevates the whole look!
Frequently Asked Questions
Can I Trim Kitchen Cabinets Without Professional Help?
Trimming kitchen cabinets can be done without professional help if you have basic woodworking skills and the right tools. Measure carefully, use a saw for precise cuts, and sand the edges for a smooth finish. Ensure you follow safety precautions and take your time to achieve a professional-looking result.
What Tools Do I Need to Trim Kitchen Cabinets?
To trim kitchen cabinets effectively, you will need a few essential tools: a miter saw for precise cuts, a measuring tape for accurate dimensions, a level to ensure even installation, a nail gun or hammer for securing trim, wood glue for added stability, and sandpaper for smoothing edges. Having these tools will help you achieve a professional finish.
What Types of Trim Are Best for Kitchen Cabinets?
When selecting trim for kitchen cabinets, consider styles that complement your overall design. Popular options include crown molding for a classic look, shaker-style trim for a modern aesthetic, and beadboard for a cottage feel. Choose materials like wood or MDF for durability and ease of maintenance. The right trim enhances visual appeal and can create a cohesive look in your kitchen.
How Do I Measure for Cabinet Trim?
To measure for cabinet trim, start by determining the height and width of the cabinet edges where the trim will be applied. Use a tape measure to get accurate dimensions, ensuring to account for any corners or angles. Record the measurements and consider the style of trim you want, as this may affect the size needed. Always double-check your measurements before purchasing materials.
How Do I Paint or Finish Trim After Installation?
To paint or finish trim after installation, start by cleaning the surface to remove dust and debris. Use painter’s tape to protect adjacent surfaces. Apply a primer if necessary, especially for raw wood. Once dry, use a high-quality paint or finish, applying in thin, even coats with a brush or roller. Allow each coat to dry completely before applying the next. Finally, remove the painter’s tape while the last coat is still slightly wet to ensure clean lines.
