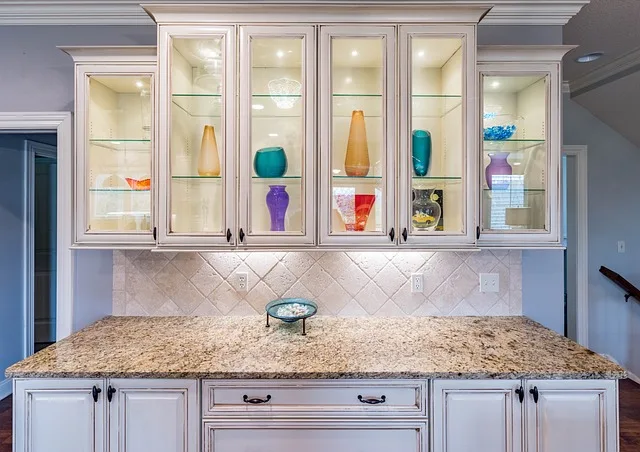
First things first, gather your tools. You’ll need a drill, a screwdriver, a level, and maybe a friend to help you out. It’s always more fun to have a buddy around, right? Before you dive in, clear everything out of the cabinets. You don’t want to be surprised by a falling dish or a rogue spice jar when you’re in the zone.
Next, it’s time to locate the screws that hold those cabinets in place. Usually, they’re tucked away in the corners or along the bottom. If you can’t find them, don’t sweat it! A little exploration with your screwdriver will do the trick. Once you’ve located the screws, start unscrewing them. It’s like unwrapping a gift—exciting and a bit suspenseful!
Now, here’s where teamwork comes into play. Have your friend hold the cabinet while you finish unscrewing. This is crucial because those cabinets can be heavier than they look. When you’re ready, gently pull the cabinet away from the wall. If it feels stuck, don’t force it; check for any hidden screws or nails.
As you take down each cabinet, think about how you want to redesign your kitchen. Maybe you’ll go for open shelving or a fresh coat of paint. The possibilities are endless! Just remember to keep safety in mind—wear gloves and goggles if you’re feeling cautious. Taking down kitchen wall cabinets can be a breeze with the right approach and a little creativity!
DIY Kitchen Makeover: A Step-by-Step Guide to Removing Wall Cabinets
First things first, gather your tools. You’ll need a drill, a screwdriver, a pry bar, and maybe even a friend to help out. Trust me, having an extra set of hands makes a world of difference! Before you start, clear everything out of the cabinets. It’s like decluttering your mind—once the space is empty, you can really see the potential.
Next, it’s time to turn off the power to any lights or outlets in the cabinets. Safety first! Once you’re all set, start by removing the doors. This not only lightens the load but also gives you a better view of what you’re working with. Unscrew the hinges and set the doors aside.

Now, here comes the fun part—removing the cabinets themselves. Use your drill to take out the screws that hold the cabinets to the wall. If they’re stubborn, a pry bar can help you gently coax them off. Just be careful not to damage the wall; think of it as a delicate dance between you and your kitchen!
As you pull those cabinets down, you might feel a rush of excitement. It’s like peeling back layers to reveal a hidden treasure. Once they’re off, patch up any holes in the wall and give it a fresh coat of paint. Voilà! You’ve just opened up your kitchen to endless possibilities.
Transform Your Space: Expert Tips for Safely Taking Down Kitchen Wall Cabinets
First things first, gather your tools. You’ll need a drill, a screwdriver, a level, and maybe even a friend to help. Trust me, having an extra pair of hands can make a world of difference. Think of it like a two-person dance; one leads, and the other follows, making the process smoother and more enjoyable.
Next, it’s all about preparation. Clear out the cabinets and remove any items that could come crashing down. Picture this: you’re in the middle of a project, and suddenly, a glass jar shatters on the floor. Yikes! To avoid that chaos, take a few minutes to empty those shelves.
Now, let’s talk about safety. Always wear protective gear—gloves, goggles, and maybe even a hard hat if you’re feeling extra cautious. It’s like putting on armor before heading into battle. You want to protect yourself from any unexpected surprises, like falling screws or rogue cabinet doors.
When you’re ready to start, locate the screws that hold the cabinets in place. Use your drill to remove them, but be gentle. Think of it as unscrewing a tight lid on a jar; you want to apply just the right amount of pressure. Once the screws are out, carefully lift the cabinet off the wall. If it feels heavy, don’t hesitate to ask for help. Remember, teamwork makes the dream work!
With these tips in your back pocket, you’re well on your way to transforming your kitchen into a space that truly reflects your style. Happy renovating!
From Drab to Fab: How to Remove Kitchen Wall Cabinets Like a Pro
First things first, gather your tools. You’ll need a screwdriver, a pry bar, and maybe a friend to help you out. Think of it like preparing for a mini adventure—having the right gear makes all the difference! Before you dive in, clear everything out of the cabinets. It’s like decluttering your mind before a big exam; you want to start fresh.
Next, turn off the power to any lights or outlets in the cabinets. Safety first, right? Once you’re all set, start by unscrewing the cabinet doors. It’s like shedding old skin—out with the old, in with the new! After that, remove the shelves. You’ll be surprised at how much lighter those cabinets feel without all that stuff inside.
Now, here comes the fun part: removing the cabinets themselves. Use your pry bar to gently pop them off the wall. It’s a bit like peeling an orange; you want to be careful not to damage the wall underneath. If they’re stubborn, don’t hesitate to call in a buddy for some extra muscle.
Unleash Your Inner Renovator: The Ultimate Guide to Dismantling Kitchen Cabinets
First things first, let’s talk tools. You don’t need a full workshop to get started; a screwdriver, a pry bar, and a hammer will do the trick. Think of these tools as your trusty sidekicks on this adventure. Before you start, clear out the cabinets. It’s like decluttering your mind before a big exam—essential for focus!
Now, let’s get to the nitty-gritty. Begin by removing the doors. It’s as simple as unscrewing a few hinges. Picture this: you’re opening a treasure chest, and each door you take off reveals more potential for your kitchen. Once the doors are off, it’s time to tackle the shelves. Most shelves are held in place by brackets or pins, so just lift them out gently. If they’re stubborn, a little nudge with your pry bar can work wonders.
Next up, the cabinet boxes themselves. These are usually attached to the wall with screws. Grab your screwdriver and start unscrewing. It’s like unwrapping a gift—each screw you remove brings you closer to the grand reveal. If you encounter any caulk or adhesive, a utility knife can help you slice through it like butter.
Say Goodbye to Clutter: A Comprehensive Guide to Removing Kitchen Wall Cabinets

First things first, envision your dream kitchen. Imagine a space where everything is within reach, yet nothing feels crowded. Removing those wall cabinets can create a sense of freedom, much like shedding a heavy winter coat on a sunny spring day. But before you grab a hammer, let’s plan this out.
Start by emptying your cabinets. This is your chance to declutter! As you pull out each item, ask yourself: “Do I really need this?” If it’s been sitting there gathering dust, it might be time to let it go. Consider donating or selling items that are still in good shape.
Next, think about what you want to replace those cabinets with. Open shelving is a fantastic option! It not only looks chic but also allows you to display your favorite dishes or cookbooks. Plus, it encourages you to keep things tidy since everything is on display.
Now, let’s talk about the actual removal process. If you’re feeling handy, you can tackle this yourself. Just make sure to turn off any electrical connections and be cautious of plumbing if your cabinets are above the sink. If you’re unsure, don’t hesitate to call in a pro.
Frequently Asked Questions
What Are the Steps to Remove Kitchen Cabinets?
To remove kitchen cabinets, start by emptying the cabinets and removing any hardware. Next, disconnect plumbing and electrical connections if applicable. Use a screwdriver to remove screws securing the cabinets to the wall and to each other. Carefully pry the cabinets away from the wall, ensuring not to damage surrounding surfaces. Finally, remove any remaining brackets or supports.
What Tools Do I Need to Remove Kitchen Wall Cabinets?
To remove kitchen wall cabinets, you will need a few essential tools: a screwdriver (preferably a power drill), a pry bar, a stud finder, a level, and safety goggles. The screwdriver is used to remove screws holding the cabinets in place, while the pry bar helps to detach them from the wall. A stud finder will assist in locating wall studs to avoid damage, and a level ensures proper alignment during reinstallation if needed. Safety goggles protect your eyes from debris.
How Do I Safely Take Down Wall Cabinets?
To safely take down wall cabinets, start by emptying all contents and removing any hardware. Use a stud finder to locate and mark the wall studs. Support the cabinet with a helper or a sturdy ladder, then unscrew it from the wall, starting from the top. Carefully lower the cabinet, ensuring it doesn’t tip or fall. Always wear safety gear and consider using a power drill for efficiency.
How Do I Prepare My Kitchen for Cabinet Removal?
To prepare your kitchen for cabinet removal, start by clearing out all items from the cabinets and countertops. Remove any hardware, such as knobs and hinges, and disconnect appliances if necessary. Protect your floors and surrounding areas with drop cloths or plastic sheeting. Ensure you have the right tools ready, such as a screwdriver, pry bar, and a hammer. Finally, turn off power to any electrical outlets in the cabinets to ensure safety during the removal process.
What Should I Do with the Wall After Removing Cabinets?
After removing cabinets, assess the wall for any damage or imperfections. Clean the surface thoroughly, patch any holes or dents with spackle, and sand the area smooth. Depending on your plans, you may choose to repaint, apply wallpaper, or install new shelving. Ensure the wall is properly primed if painting, and consider adding decorative elements to enhance the space.