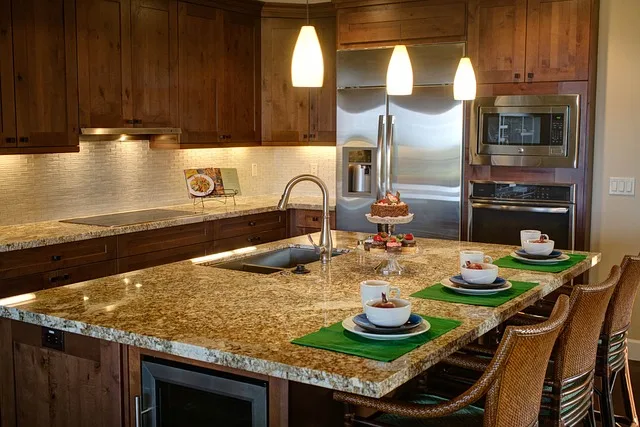
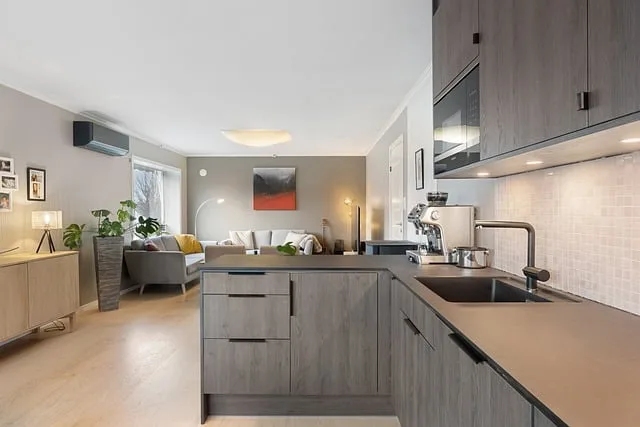
First things first, gather your supplies. You’ll need a good quality paint (preferably a semi-gloss or satin finish for durability), primer, sandpaper, a paintbrush, and a roller. Don’t forget the drop cloths to protect your floors and a few old rags for any spills. It’s like preparing for a mini adventure—make sure you have everything you need before diving in!
Next, it’s time to prep those cabinets. Remove all the hardware and doors, and give everything a good clean. Think of it as giving your cabinets a spa day! Once they’re squeaky clean, lightly sand the surfaces to help the paint stick. This step is crucial; it’s like giving your cabinets a fresh canvas to work with.
Now, apply a coat of primer. This is where the magic begins! Primer not only helps the paint adhere better but also ensures that the true color shines through. After the primer dries, grab your paint and start applying it with a brush for the edges and a roller for the flat surfaces. It’s like painting a masterpiece—take your time and enjoy the process!
Transform Your Space: A Step-by-Step Guide to DIY Kitchen Cabinet Painting
First things first, gather your supplies. You’ll need a good quality paint, primer, sandpaper, and some brushes or a sprayer. Think of this as your toolkit for a mini-makeover. Just like a chef needs the right ingredients to whip up a delicious meal, you need the right tools to create a stunning kitchen.
Next, it’s time to prep those cabinets. Remove the doors and hardware, and give everything a good clean. Imagine you’re giving your cabinets a spa day—scrubbing away the grime and dirt so they’re ready for their big reveal. Once they’re clean, lightly sand the surfaces to help the paint stick. It’s like giving your cabinets a fresh coat of confidence!
Now, let’s talk about painting. Start with a primer to create a smooth base. Think of it as laying down the foundation for a beautiful house. Once that’s dry, it’s time to unleash your creativity with your chosen paint color. Whether you’re going for a bold navy or a soft pastel, this is where your personality shines through. Use even strokes and don’t rush; good things take time!

After the paint dries, reattach the hardware and doors. Stand back and admire your handiwork! It’s like unveiling a masterpiece you’ve created with your own hands. With just a little effort, you’ve transformed your kitchen into a space that feels fresh and inviting. So, are you ready to roll up your sleeves and get started? Your dream kitchen is just a paint job away!
Revamp Your Kitchen on a Budget: Expert Tips for DIY Cabinet Painting
Imagine walking into a kitchen that feels brand new, all thanks to a splash of color on those tired cabinets. It’s like giving your kitchen a facelift without the hefty price tag. First things first, gather your supplies. You’ll need some quality paint, a good primer, brushes, and maybe even a roller for those larger surfaces. Think of it as your artist’s toolkit, ready to create a masterpiece!
Now, let’s talk prep work. This is where the magic begins. Start by removing the cabinet doors and hardware. It’s like taking off a pair of old shoes before slipping into something stylish. Clean the surfaces thoroughly to ensure the paint adheres well. A little elbow grease goes a long way!
Once everything is prepped, it’s time to unleash your creativity. Choose a color that speaks to you—maybe a bold navy or a soft sage green. Picture how it will brighten up your space! Apply a coat of primer first; it’s like laying a solid foundation for a house. After that, let your chosen paint shine. A couple of coats will do the trick, and don’t forget to let each layer dry completely.
Finally, reattach the hardware and doors, and voilà! You’ve just given your kitchen a stunning makeover. It’s amazing how a little paint can breathe new life into your home. So, roll up those sleeves and get ready to create a kitchen that you’ll love for years to come!
From Drab to Fab: How to Achieve a Professional Finish When Painting Kitchen Cabinets Yourself
First off, prep work is key. Think of it as laying the foundation for a masterpiece. Start by removing all the cabinet doors and hardware. This might feel like a hassle, but trust me, it’s worth it. Clean those surfaces thoroughly to get rid of grease and grime—imagine trying to paint over a dirty canvas; it just won’t work!
Next, sand those cabinets down. This step is like giving your cabinets a fresh start. Use a fine-grit sandpaper to create a smooth surface that paint can cling to. Don’t skip this; it’s the secret sauce to that professional look. After sanding, wipe everything down with a damp cloth to remove dust.

Now, let’s talk paint. Choosing the right type is crucial. Go for a high-quality, durable paint that’s designed for cabinets. It’s like picking the right outfit for a big event—you want to look good and feel confident! A satin or semi-gloss finish can give your cabinets that sleek, polished look.
When it’s time to paint, use a foam roller for a smooth application. Think of it as rolling out a fresh layer of icing on a cake. For corners and edges, a brush will do the trick. Apply multiple thin coats rather than one thick one; this will help avoid drips and ensure an even finish.
Finally, let everything dry completely before reattaching the doors and hardware. It’s like letting a fine wine breathe—patience pays off! With these steps, your kitchen cabinets will go from drab to fab, and you’ll feel like a DIY superstar!
The Ultimate DIY Kitchen Cabinet Makeover: Tools, Techniques, and Tips
First off, you’ll need some essential tools. A good quality paintbrush and roller are must-haves for a smooth finish. Don’t forget a sander to prep those surfaces—think of it as giving your cabinets a fresh face before the big reveal. A paint sprayer can also be a game-changer if you want a professional look without the hassle. And, of course, a trusty screwdriver will help you remove hardware and doors with ease.
Now, onto techniques! Start by cleaning your cabinets thoroughly. You wouldn’t want to paint over grease and grime, right? Next, sand down the surfaces to create a rough texture for the paint to adhere to. It’s like giving your cabinets a little exfoliation! After that, apply a primer to ensure the paint sticks and lasts. When it comes to color, don’t be afraid to go bold! A vibrant hue can turn your kitchen from drab to fab in no time.
Finally, let’s talk tips. Always test your paint on a small area first—think of it as a dress rehearsal before the big show. And remember, patience is key! Allow each coat to dry completely before moving on to the next. It’s all about layering for that perfect finish. So, roll up your sleeves, grab those tools, and get ready to transform your kitchen into a space you’ll love!
Breathe New Life into Your Kitchen: A Beginner’s Guide to Painting Cabinets
First things first, gather your supplies. You’ll need paint (of course), a good primer, brushes, and some sandpaper. Think of the primer as the foundation of a house; it sets the stage for everything that follows. Choose a color that speaks to you—maybe a soft blue for a coastal vibe or a bold red for a pop of personality. The world is your oyster!
Now, let’s talk prep work. This is where the magic begins. Start by removing the cabinet doors and hardware. It’s like taking off a jacket before a big night out—everything feels lighter. Give the surfaces a good clean and a light sand to help the paint stick. Imagine you’re giving your cabinets a mini spa day; they’ll thank you for it!
Once everything is prepped, it’s time to paint! Apply a coat of primer first, and then follow up with your chosen paint. Use long, even strokes, and don’t rush it. Think of it as painting a masterpiece; every stroke counts. If you’re feeling adventurous, consider adding a second color for an accent—maybe a fun pop on the inside of the cabinets.
After the paint dries, reattach the hardware and doors. Stand back and admire your handiwork! You’ve just transformed your kitchen into a space that feels brand new. It’s amazing how a little paint can make such a big difference, isn’t it?
Color Your World: Choosing the Perfect Paint for Your DIY Kitchen Cabinet Project
First off, think about the vibe you want to create. Are you dreaming of a cozy farmhouse feel, or maybe a sleek modern look? The color you choose can set the entire mood of your kitchen. For a warm, inviting atmosphere, consider soft pastels or earthy tones. On the flip side, if you’re aiming for a bold statement, deep blues or striking reds can really make your cabinets pop.
Next, let’s talk about finish. You wouldn’t wear a shiny suit to a casual barbecue, right? The same goes for paint! A satin or semi-gloss finish is often ideal for kitchen cabinets because it’s durable and easy to clean. Think of it as the perfect outfit that balances style and practicality.
Now, don’t forget about the prep work! Just like you wouldn’t skip washing your hair before a big night out, you need to prep your cabinets properly. Sanding and priming are crucial steps that ensure your paint adheres well and lasts longer. It’s like laying a solid foundation before building your dream home.
Frequently Asked Questions
How Long Does It Take to Paint Kitchen Cabinets?
The time required to paint kitchen cabinets typically ranges from a few days to a week. This includes preparation, priming, painting, and drying time. Factors such as the number of cabinets, the type of paint used, and the method of application can influence the overall duration.
What Type of Paint is Best for Kitchen Cabinets?
For kitchen cabinets, a high-quality acrylic latex paint is recommended due to its durability, ease of cleaning, and resistance to moisture. Additionally, consider using a semi-gloss or satin finish for a smooth, wipeable surface that can withstand daily wear and tear.
What Supplies Do I Need to Paint Kitchen Cabinets DIY?
To successfully paint kitchen cabinets yourself, gather the following supplies: high-quality paint (preferably acrylic or latex), primer, sandpaper (120 and 220 grit), a paintbrush and foam roller, painter’s tape, a drop cloth, a clean cloth for dusting, and a paint tray. Additionally, consider using a deglosser for better adhesion and a clear topcoat for durability.
How Do I Prepare Kitchen Cabinets for Painting?
To prepare kitchen cabinets for painting, start by removing all hardware and doors. Clean surfaces thoroughly with a degreaser to eliminate grease and grime. Sand the surfaces lightly to create a smooth base for paint adhesion, and fill any holes or imperfections with wood filler. Wipe down the cabinets with a damp cloth to remove dust, then apply a primer suitable for your cabinet material. Allow the primer to dry completely before proceeding with your chosen paint.
What Are Common Mistakes to Avoid When Painting Cabinets?
When painting cabinets, avoid common pitfalls such as inadequate surface preparation, using the wrong type of paint, neglecting to apply a primer, and skipping proper drying times. Ensure surfaces are clean and sanded for better paint adhesion. Choose high-quality paint suitable for cabinetry, and always follow manufacturer instructions for best results.