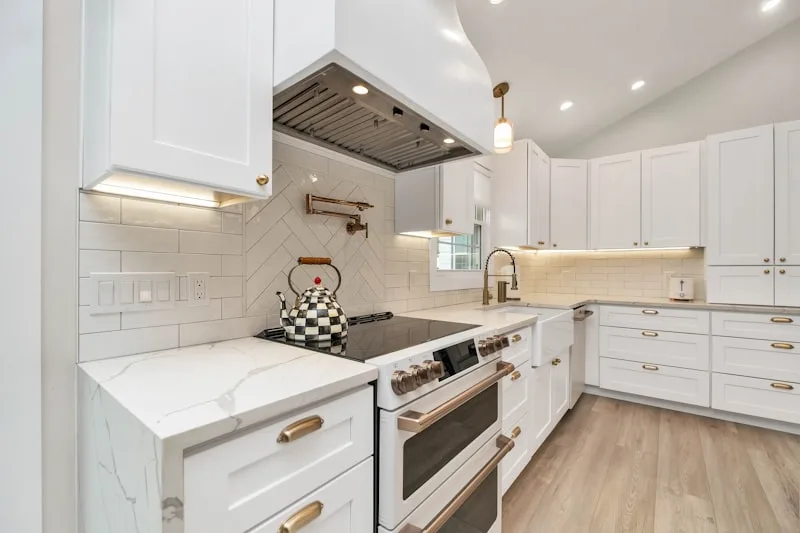
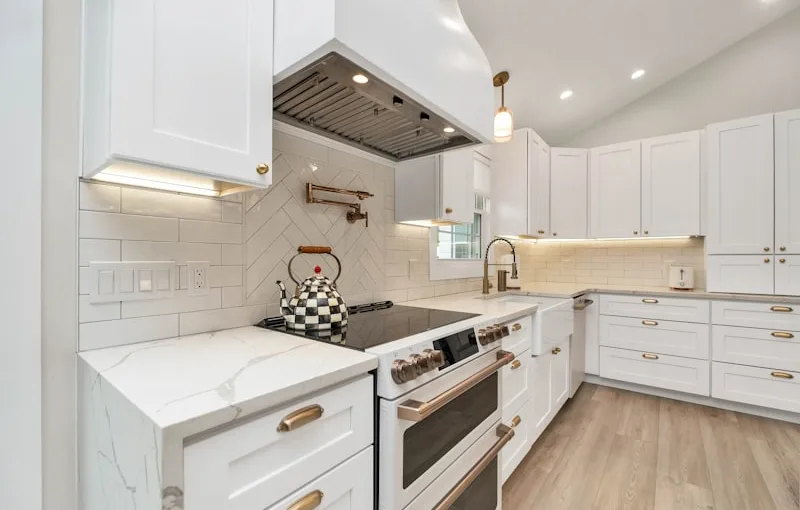
First things first, gather your supplies. You’ll need a good quality primer, paint (preferably a semi-gloss or satin finish for durability), sandpaper, a paintbrush, and a roller. Think of this as your toolkit for transformation—like a chef gathering ingredients for a delicious meal!

Now, let’s prep those cabinets. Start by removing all the doors and hardware. It’s like taking the lid off a pot; you want to see what’s cooking inside! Clean the surfaces thoroughly to remove grease and grime. A little elbow grease goes a long way here. Once they’re clean, lightly sand the surfaces. This step is crucial because it helps the paint stick better, just like how a good marinade helps flavors penetrate meat.
Next up, apply a coat of primer. This is your secret weapon! It not only helps the paint adhere but also ensures that the final color pops. After the primer dries, it’s time for the fun part—painting! Use a brush for the edges and a roller for the flat surfaces. Imagine you’re spreading frosting on a cake; smooth, even strokes are key.
Don’t rush this process. Allow each coat to dry completely before applying the next. It’s like waiting for a cake to cool before icing it—patience pays off! Once you’ve achieved the desired color, reattach the hardware and doors. Stand back and admire your handiwork. You’ve just transformed your kitchen into a fresh, inviting space!
Transform Your Space: A Step-by-Step Guide to Painting Inside Kitchen Cabinets
First things first, gather your supplies. You’ll need paint (of course!), a good primer, brushes, rollers, and some sandpaper. Think of this as your toolkit for a mini-makeover. Just like a chef needs the right ingredients, you need the right tools to whip up a stunning kitchen.
Next, it’s time to prep those cabinets. Remove the doors and hardware—this is like taking off your old clothes before putting on a fabulous new outfit. Give everything a good clean, and then sand the surfaces lightly. This helps the paint stick better, kind of like how a good base coat makes your nail polish pop!
Now, let’s talk about priming. Apply a coat of primer to ensure your paint goes on smoothly and the color shines through. It’s like laying down a solid foundation before building a house. Once that’s dry, grab your paint and start applying it with a brush or roller. Remember, patience is key here. A couple of thin coats will give you a professional finish, rather than one thick coat that could lead to drips and unevenness.
While the paint dries, take a moment to admire your work. It’s like watching a caterpillar turn into a butterfly! Once everything is dry, reattach the hardware and hang those doors back up. Voilà! You’ve just transformed your kitchen into a space that feels brand new, all with a little paint and a bit of elbow grease.
Revitalize Your Kitchen: Expert Tips for Painting Cabinet Interiors Like a Pro
First off, prep is everything. Think of it as laying the groundwork for a masterpiece. Start by emptying your cabinets and giving them a good clean. Dust and grease can be sneaky little culprits that ruin your finish. Once they’re spotless, lightly sand the surfaces to help the paint stick. It’s like giving your cabinets a fresh face before the big reveal!
Next, choose the right paint. You want something durable that can withstand the hustle and bustle of kitchen life. A semi-gloss or satin finish is perfect because it’s easy to wipe down and reflects light beautifully. And don’t forget to grab a high-quality brush or roller—this is where the magic happens!
Now, here’s a pro tip: use a primer! It’s like a protective shield that ensures your paint goes on smoothly and lasts longer. After priming, apply your chosen color in thin, even coats. Patience is key here; it’s better to do multiple light coats than one heavy one. Think of it like building layers of flavor in a delicious dish!
Finally, let your cabinets dry completely before putting everything back. This is the moment you’ve been waiting for! When you open those doors, you’ll be greeted by a fresh, vibrant interior that makes your kitchen feel brand new. So, roll up your sleeves and get ready to transform your space!
From Drab to Fab: The Ultimate DIY Guide to Painting Kitchen Cabinet Interiors
First things first, gather your supplies. You’ll need some high-quality paint, a good brush, and maybe even a roller for those larger surfaces. Think of it as gathering your tools for a treasure hunt; you’re about to uncover a hidden gem in your home! Before you dive in, make sure to empty out those cabinets. It’s like decluttering your mind before a big project—clear space leads to clear creativity.
Now, let’s talk prep work. Clean those surfaces like you’re getting ready for a dinner party. Dust and grease can be the party crashers of your painting project. Once everything’s spick and span, it’s time to sand down the interiors. This step is crucial; it’s like giving your cabinets a fresh canvas to work with. A little elbow grease here will pay off big time!
When it comes to choosing your paint, think about the vibe you want to create. Do you want a calming seafoam green or a bold, vibrant yellow? The choice is yours! Apply the paint in smooth, even strokes, and watch as your cabinets transform before your eyes. It’s like watching a caterpillar turn into a butterfly—magical and oh-so-satisfying.
So, are you ready to unleash your inner DIY guru? Your kitchen is waiting for that fab makeover!
Unlock Your Kitchen’s Potential: How to Achieve a Fresh Look by Painting Cabinet Interiors
First off, let’s talk about the magic of color. Choosing a bold hue for your cabinet interiors can create a stunning contrast with the exterior. Think of it as a secret garden hidden behind closed doors. When you open those cabinets, a burst of color greets you, making even the simplest kitchen items feel special. Whether it’s a sunny yellow or a calming teal, the right shade can completely change the vibe of your kitchen.
Now, you might be wondering, “Isn’t this a huge hassle?” Not at all! With a little prep work, you can dive into this DIY project without breaking a sweat. Start by emptying your cabinets and giving them a good clean. Then, grab some painter’s tape to protect the edges and a brush or roller to apply your chosen paint. It’s like giving your cabinets a fresh coat of personality!
Color Your Kitchen: Creative Ideas for Painting Inside Your Cabinets
First off, think about the vibe you want to create. Do you crave a calm, beachy feel? Soft blues or sandy beiges can transport you to a seaside escape every time you reach for a dish. Or maybe you’re feeling bold? A vibrant yellow or a deep emerald green can add a splash of personality that makes your kitchen the heart of your home.
Now, let’s talk technique. Before you dive in, make sure to clean those surfaces thoroughly. You wouldn’t want dust bunnies crashing your color party! Once they’re squeaky clean, a good primer will help your paint stick like glue. It’s like laying a solid foundation before building a house—essential for a long-lasting finish.
And don’t forget about the fun part: patterns! If you’re feeling adventurous, consider adding stripes or polka dots to the inside of your cabinets. It’s like wearing a funky pair of socks that only you know about—quirky and delightful! You can even use stencils to create intricate designs that reflect your personality.
Finally, lighting plays a crucial role. When you open those cabinet doors, the right light can make your chosen color pop, creating a stunning visual effect. Think of it as the spotlight on your kitchen’s stage, showcasing your creative flair. So, grab that paintbrush and let your imagination run wild! Your kitchen is about to become a canvas of creativity.
Frequently Asked Questions
What Type of Paint is Best for Kitchen Cabinets?
For kitchen cabinets, a high-quality acrylic latex paint is recommended due to its durability, ease of cleaning, and resistance to moisture. Consider using a semi-gloss or satin finish for added sheen and protection against stains and grease.
How Long Does It Take to Paint Kitchen Cabinets?
The time required to paint kitchen cabinets typically ranges from a few days to a week. This includes preparation, priming, painting, and drying time. Factors such as the number of cabinets, the type of paint used, and the method of application can influence the overall duration.
What Supplies Do I Need to Paint Kitchen Cabinets?
To paint kitchen cabinets, you will need the following supplies: high-quality paint suitable for cabinetry, primer, sandpaper or a sanding block, a paintbrush and roller, painter’s tape, a drop cloth, and a clean cloth for dusting. Additionally, consider using a paint sprayer for a smoother finish and a respirator mask for safety.
Can I Paint Kitchen Cabinets Without Sanding?
Yes, you can paint kitchen cabinets without sanding by using a bonding primer that adheres well to the surface. This method saves time and effort while still providing a durable finish. Ensure the cabinets are clean and free of grease for the best results.
How Do I Prepare Kitchen Cabinets for Painting?
To prepare kitchen cabinets for painting, start by removing all hardware and doors. Clean surfaces thoroughly with a degreaser to eliminate grease and grime. Sand the surfaces lightly to create a smooth base for paint adhesion. Fill any holes or imperfections with wood filler and sand again once dry. Finally, wipe down the cabinets with a damp cloth to remove dust before applying primer and paint.
