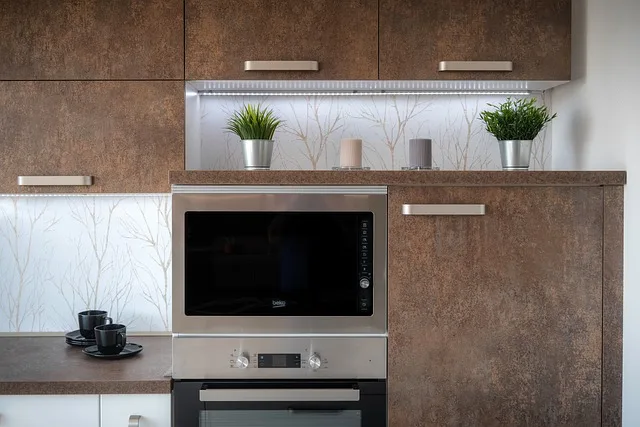
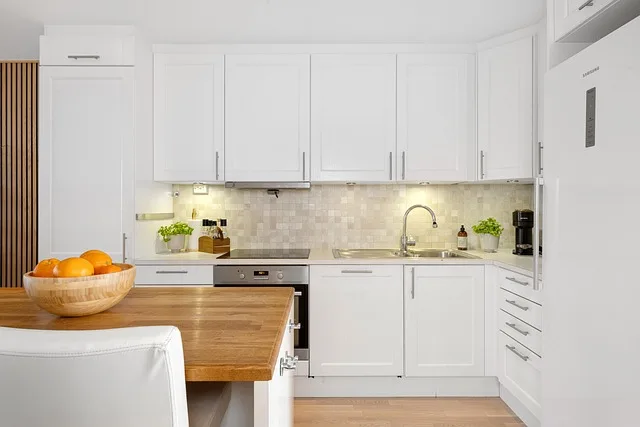
First things first, gather your tools. You’ll need a stud finder, level, drill, screws, and a trusty tape measure. Think of these tools as your kitchen renovation superheroes, ready to save the day! Start by locating the studs in your wall. This is crucial because you want your cabinets to be securely anchored. No one wants a cabinet full of dishes crashing down, right?
Once you’ve marked the studs, it’s time to measure the height for your cabinets. A good rule of thumb is to leave about 18 inches between the countertop and the bottom of the cabinets. This gives you enough space to work without feeling cramped. Use your level to draw a straight line where the bottom of the cabinets will sit. This line is your guiding star!
Now, it’s time to lift those cabinets into place. If you’re working solo, a little trick is to use a couple of wooden blocks to prop them up while you secure them. It’s like having a mini assistant! Start by drilling screws into the studs through the cabinet’s mounting brackets. Make sure everything is level as you go—nobody wants a slanted cabinet!
DIY Delight: A Step-by-Step Guide to Mounting Your Upper Kitchen Cabinets Like a Pro!
First things first, gather your tools. You’ll need a stud finder, level, drill, screws, and a trusty tape measure. Think of these tools as your kitchen warriors, ready to help you conquer the task ahead. Start by locating the studs in your wall; this is where the real magic happens. Why? Because mounting your cabinets to the studs ensures they’re secure and won’t come crashing down when you’re reaching for that fancy dish.
Next, measure the height where you want your cabinets to sit. A good rule of thumb is to leave about 18 inches between the countertop and the bottom of the cabinets. Picture it like a cozy little space where you can whip up your favorite meals without feeling cramped. Once you’ve marked your spots, it’s time to drill those pilot holes. This step is crucial—think of it as laying the foundation for a sturdy house.
Now, here comes the fun part! With a friend’s help (because teamwork makes the dream work), lift those cabinets into place. Use your level to ensure they’re straight—nobody wants a crooked cabinet that looks like it’s about to slide off the wall! Secure them with screws, and voilà! You’ve just mounted your upper kitchen cabinets like a pro.
Feel that sense of accomplishment? That’s the sweet taste of DIY success! Now, go ahead and fill those cabinets with your favorite kitchen treasures.
No Pros Needed: Master the Art of Installing Upper Kitchen Cabinets Yourself!
First things first, gather your tools. You’ll need a drill, a level, a stud finder, and some screws. Think of these tools as your trusty sidekicks on this DIY adventure. Once you’ve got everything ready, it’s time to measure. Measure twice, cut once, right? This old saying holds true! Mark where your cabinets will go, ensuring they’re level and aligned. It’s like drawing the blueprint for your kitchen’s future.
Now, let’s talk about lifting those cabinets. It might feel like you’re trying to lift a small elephant, but don’t worry! Grab a friend to help you out. Teamwork makes the dream work, after all. With your buddy holding one end, you can secure the cabinet in place. Use your level to make sure everything is just right—nobody wants a crooked cabinet, right?
Once you’ve got them up, it’s time to secure them to the wall. This is where the stud finder comes in handy. You want to make sure your cabinets are anchored to the studs for that extra stability. Think of it as giving your cabinets a strong backbone!
Elevate Your Space: How to Successfully Mount Upper Kitchen Cabinets Without Hiring Help
First things first, gather your tools. You’ll need a stud finder, level, drill, and some sturdy screws. Think of these tools as your trusty sidekicks on this adventure. Start by locating the studs in your wall—these are the strong points that will support your cabinets. It’s like finding the hidden treasure in your wall!
Next, measure the height where you want your cabinets to sit. A good rule of thumb is to leave about 18 inches between the countertop and the bottom of the cabinets. This space is like the breathing room your kitchen needs, allowing for easy access and a spacious feel.
Once you’ve marked your spots, it’s time to hang those cabinets. Grab a friend if you can; it’s always more fun to tackle a project together! Lift the cabinet into place and use your level to ensure it’s straight. There’s nothing worse than a crooked cabinet—it’s like wearing mismatched socks!
Now, drill those screws into the studs, securing your cabinets firmly. As you tighten them, picture your kitchen coming to life, filled with the aroma of your favorite meals. With a little patience and a sprinkle of creativity, you’ll have a stunning kitchen that reflects your style. So, roll up your sleeves and get ready to impress yourself!
From Novice to Expert: Your Ultimate DIY Guide to Installing Upper Kitchen Cabinets
First things first, gather your supplies. You’ll need a stud finder, level, drill, screws, and, of course, your cabinets. Think of these tools as your trusty sidekicks, ready to help you conquer this project. Start by locating the studs in your wall. This is crucial because you want your cabinets to be securely anchored, just like a ship needs a strong anchor to stay put.
Next, measure twice and cut once—this old adage rings true here. Mark where your cabinets will go, ensuring they’re level. Imagine trying to pour a drink from a tilted glass; it’s just messy! Once you’ve got your marks, it’s time to lift those cabinets into place. This part might feel like a workout, but hey, who needs a gym membership when you can build muscle while beautifying your kitchen?
Now, here’s where the magic happens. Secure the cabinets to the wall using screws, making sure they’re snug and secure. It’s like putting the final piece in a puzzle; everything just clicks into place. Don’t forget to check the level again—nobody wants a wobbly cabinet!
Save Money and Gain Skills: A Homeowner’s Guide to Mounting Upper Kitchen Cabinets
First off, let’s talk about the money you’ll save. Hiring a professional can cost a pretty penny, but with a little elbow grease and the right tools, you can do it yourself! Think of it like cooking a gourmet meal at home instead of dining out—way more satisfying and way less expensive. Plus, you’ll gain a sense of accomplishment that money can’t buy.

Now, let’s dive into the skills you’ll acquire. Mounting cabinets isn’t just about hammering nails; it’s a crash course in DIY home improvement. You’ll learn how to measure accurately, use a level, and even handle a drill like a pro. It’s like leveling up in a video game—each step you take makes you more skilled and confident. And who knows? This newfound expertise might inspire you to tackle other projects around the house.
Before you start, gather your materials: cabinets, screws, a stud finder, and a trusty level. Don’t forget safety gear! As you measure and mark, think of it as laying the foundation for your kitchen’s new look. When you finally lift those cabinets into place, it’s like unveiling a surprise gift you’ve been waiting for.
Cabinet Confidence: Tips and Tricks for DIY Installation of Upper Kitchen Cabinets
First off, preparation is key. Before you even think about lifting those cabinets, gather your tools. You’ll need a level, a drill, screws, and a stud finder. Think of these tools as your trusty sidekicks, ready to help you conquer the challenge ahead. Once you’ve got everything, it’s time to measure. Measure twice, cut once—this old saying holds true! Mark where your cabinets will go, ensuring they’re level and aligned.
Next, let’s talk about the studs. Finding the wall studs is like discovering hidden treasure; they’re your best friends when it comes to securing those cabinets. Use your stud finder to locate them, and don’t be shy about marking their positions. This will give your cabinets the sturdy support they need, preventing any unfortunate mishaps down the line.

Now, when it’s time to lift those cabinets, consider enlisting a buddy. It’s like having a dance partner; you’ll move in sync, making the process smoother and more enjoyable. Once in place, use your level to ensure everything is just right. If it’s off, don’t panic! A little adjustment can go a long way.
Frequently Asked Questions
What is the Best Method for Securing Cabinets to the Wall?
To securely fasten cabinets to the wall, use wall anchors or brackets designed for the cabinet’s weight. Locate wall studs for maximum support, and drill pilot holes before inserting screws. Ensure the cabinet is level before tightening the screws to prevent tipping. For added safety, consider using anti-tip devices that further stabilize the cabinet.
What Safety Precautions Should I Take When Installing Cabinets?
When installing cabinets, ensure safety by wearing protective gear such as gloves and goggles. Use a sturdy ladder for reaching high areas and secure it properly. Check for electrical wires and plumbing before drilling. Keep the workspace clear of hazards and ensure tools are in good condition. Enlist help for heavy lifting to prevent injury.
What Tools Do I Need to Mount Upper Kitchen Cabinets?
To mount upper kitchen cabinets, you will need a stud finder to locate wall studs, a level to ensure cabinets are straight, a drill for making holes, screws for securing the cabinets, a measuring tape for accurate placement, and a pencil for marking. Additionally, a helper can assist in holding the cabinets in place during installation.
How Do I Measure for Proper Cabinet Placement?
To ensure proper cabinet placement, start by measuring the height, width, and depth of the space where the cabinets will be installed. Use a level to check for evenness and note any obstructions like outlets or plumbing. Mark the desired cabinet locations on the wall, considering both functionality and aesthetics. Double-check all measurements before installation to ensure a perfect fit.
How Can I Ensure Cabinets Are Level and Aligned?
To ensure cabinets are level and aligned, start by using a level tool to check each cabinet’s horizontal and vertical alignment. Adjust the cabinet legs or shims as needed to achieve a level surface. For alignment, use clamps to hold cabinets together and check gaps between them. Make necessary adjustments to ensure they are flush with each other and the wall. Finally, secure the cabinets to the wall and each other to maintain their position.