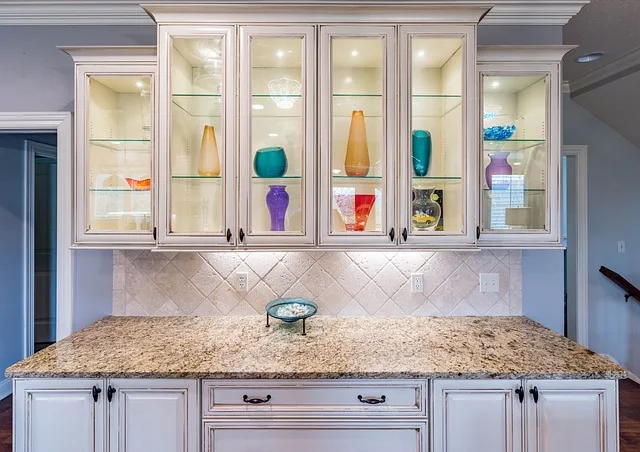
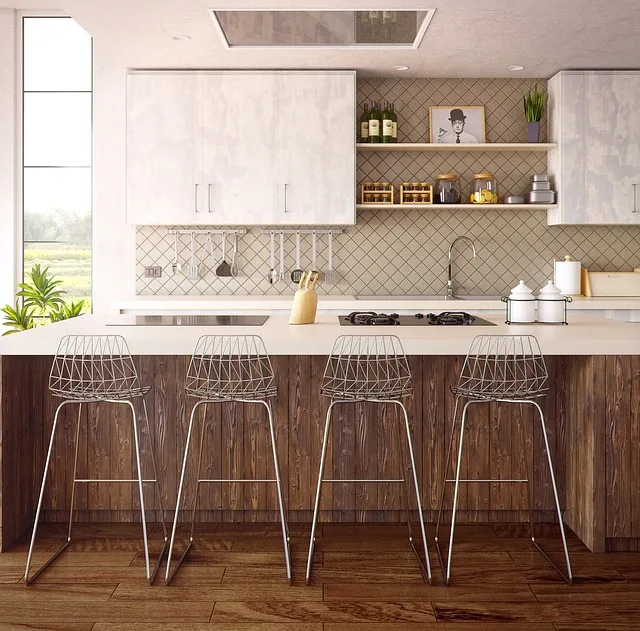
First things first, gather your tools. You’ll need a level, a drill, screws, and a stud finder. Think of the stud finder as your treasure map—it’ll help you locate the sturdy spots in your wall where the cabinets can hang securely. Once you’ve marked those studs, it’s time to measure. Measure twice, cut once, right? Well, in this case, measure twice, and mark your cabinet heights. A good rule of thumb is to leave about 18 inches between the countertop and the bottom of the upper cabinets.
Now, let’s talk about lifting those cabinets. It’s a two-person job, so grab a buddy. While one of you holds the cabinet in place, the other can drill into the studs. Use a level to ensure everything is straight—nobody wants a crooked cabinet that looks like it’s about to slide off the wall!
Once the first cabinet is secure, it’s time to connect the rest. You can use clamps to hold them together while you drill. It’s like a team of superheroes coming together to form a powerful alliance!
Step-by-Step Guide: Mastering the Art of Installing Kitchen Upper Cabinets
First things first, gather your tools. You’ll need a level, a drill, screws, a stud finder, and a measuring tape. Think of these tools as your trusty sidekicks on this adventure. Now, before you start swinging that drill, take a moment to plan your layout. Measure the space where your cabinets will go, and mark the studs in the wall. This is like laying the foundation for a house; it’s crucial for a sturdy installation.
Next, it’s time to hang those cabinets! Start with the corner cabinet if you have one. Use a helper to lift it into place while you secure it to the wall. Remember, teamwork makes the dream work! Once that’s up, move on to the adjacent cabinets. Make sure they’re level with each other—nothing screams “DIY disaster” like crooked cabinets.
As you install each cabinet, use shims to adjust for any unevenness in the wall. Think of shims as the little heroes that save the day, ensuring everything sits perfectly. Once all the cabinets are up, it’s time to secure them together. This step is like the icing on the cake, bringing everything together for a polished look.
Finally, don’t forget to add the finishing touches, like crown molding or cabinet doors. These details are what elevate your kitchen from ordinary to extraordinary. So, are you ready to impress your friends with your newfound skills? Let’s get to work and make that kitchen shine!
Elevate Your Space: Expert Tips for Installing Upper Cabinets Like a Pro
First off, preparation is key. Before you even think about picking up a drill, measure your space. You wouldn’t want to end up with cabinets that are too big or too small, would you? Use a level to mark where the bottom of your cabinets will sit. This little step can save you a world of headaches later on. Think of it as laying the foundation for a house; if it’s not right, everything else will be off-kilter.

Next, gather your tools. You’ll need a stud finder, a drill, screws, and maybe even a friend to help lift those heavy cabinets. Trust me, having an extra set of hands can make a world of difference. It’s like having a buddy to help you carry groceries; it just makes the task easier and more enjoyable.
When it comes to actually hanging the cabinets, start with the corner unit if you have one. This will give you a solid reference point for the rest. Secure it to the wall studs for maximum stability—think of it as anchoring a ship in a storm. Once that’s in place, you can work your way outwards, ensuring everything is level and aligned.
Finally, don’t forget to add those finishing touches. Whether it’s sleek hardware or a fresh coat of paint, these details can elevate your cabinets from ordinary to extraordinary. So, roll up your sleeves, channel your inner DIY guru, and get ready to transform your space!
DIY Delight: Transform Your Kitchen with These Upper Cabinet Installation Hacks
First off, let’s talk about planning. Imagine your kitchen as a blank canvas. Before you start, sketch out where you want those cabinets to go. Think about functionality—do you need easy access to your spices, or is it more about showcasing your fancy dishware? A little forethought can save you a ton of headaches later.

Now, onto the installation hacks! One of the best tricks is using a level and a ledger board. This nifty little board acts like your best friend, helping you keep everything straight and even. No one wants a cabinet that looks like it’s about to slide off the wall! And here’s a pro tip: use a stud finder to locate those hidden wooden beams in your walls. Trust me, your cabinets will thank you for the extra support.
Don’t forget about the finishing touches! Adding crown molding can elevate your cabinets from basic to breathtaking. It’s like putting a cherry on top of a sundae—simple yet oh-so-satisfying. Plus, painting your cabinets a bold color can inject personality into your kitchen, making it a space you love to spend time in.
From Blueprint to Reality: A Comprehensive Guide to Installing Kitchen Upper Cabinets
First things first, gather your tools. You’ll need a level, a drill, screws, and a stud finder—think of these as your trusty sidekicks on this adventure. Once you’ve got your gear, it’s time to measure. Measure twice, cut once, right? Mark where your cabinets will go on the wall, ensuring they’re level. This is like laying the foundation for a house; if it’s off, everything else will be too.
Next, it’s all about the installation. Start with the corner cabinet if you have one; it’s like the anchor of your kitchen. Secure it to the wall studs, and then move on to the adjacent cabinets. Use clamps to hold them in place while you drill. It’s a bit like assembling a puzzle—everything needs to fit just right.
Now, let’s talk about the finishing touches. Once your cabinets are up, it’s time to add the doors and hardware. This is where your personality shines through! Choose knobs and pulls that reflect your style—think of them as the jewelry of your kitchen.
Finally, step back and admire your work. You’ve taken your kitchen from a mere idea to a functional space that’s uniquely yours. Installing upper cabinets might seem tricky at first, but with a little patience and the right approach, you’ll find it’s a rewarding project that elevates your home. So, are you ready to roll up your sleeves and get started?
The Ultimate Checklist for Installing Kitchen Upper Cabinets: Don’t Miss a Step!
First things first, gather your tools. You’ll need a level, a drill, screws, and a stud finder. Think of these tools as your trusty sidekicks, ready to help you conquer the installation process. Next, measure your space. It’s like laying the groundwork for a solid foundation; you wouldn’t build a house on sand, right? Measure twice, cut once—this old adage rings true here!
Now, let’s talk about the layout. Visualize where each cabinet will go. Use painter’s tape to outline their positions on the wall. This step is like sketching a masterpiece before you start painting; it gives you a clear vision of the final product. Once you’re happy with the layout, it’s time to locate the studs in your wall. Trust me, you want to anchor those cabinets securely!
When it comes to lifting the cabinets, don’t go solo. Grab a friend or family member; teamwork makes the dream work! As you lift, ensure the cabinets are level. This is where your level tool shines—like a guiding star, it’ll help you keep everything straight.
Finally, secure the cabinets with screws, making sure they’re tightly fastened. It’s like putting the cherry on top of a sundae; it completes the look and ensures everything stays in place. With this checklist in hand, you’re well on your way to transforming your kitchen into a space you’ll love!
Cabinet Installation Made Easy: Your Go-To Guide for a Flawless Finish
First things first, preparation is key. Before you even think about picking up a tool, take a moment to measure your space. You wouldn’t want to buy cabinets that don’t fit, right? Think of it like trying to squeeze into a pair of shoes that are two sizes too small—uncomfortable and frustrating! Once you’ve got your measurements down, it’s time to choose your cabinets. Whether you’re going for a modern look or something more rustic, pick a style that speaks to you.
Now, let’s talk tools. You don’t need a whole workshop to get started, just a few essentials like a level, a drill, and some screws. Picture this: you’re assembling a puzzle, and each piece needs to fit just right. That’s what your tools will help you do—create a seamless look that makes your cabinets pop.
When it comes to installation, start with the upper cabinets. It’s like building a house; you want a solid foundation before adding the roof! Use a level to ensure everything is straight, and don’t be afraid to ask for a helping hand. Two sets of hands are always better than one, especially when you’re lifting those heavy cabinets.
Frequently Asked Questions
What Tools Do I Need to Install Kitchen Upper Cabinets?
To install kitchen upper cabinets, you will need a stud finder, level, tape measure, drill, screwdriver, and a hammer. Additionally, having clamps, a square, and safety goggles can enhance accuracy and safety during the installation process.
What is the Best Height for Installing Upper Cabinets?
The ideal height for installing upper cabinets is typically between 54 to 60 inches above the floor, measured to the bottom of the cabinet. This height allows for comfortable access while accommodating standard countertop heights and ensuring adequate space for tasks. Adjustments may be necessary based on individual preferences and ceiling height.
What Are Common Mistakes to Avoid When Installing Upper Cabinets?
When installing upper cabinets, avoid common mistakes such as not measuring accurately, failing to use a level, neglecting to secure cabinets to wall studs, overlooking the importance of proper spacing, and skipping the use of shims for alignment. Ensuring these factors are addressed will lead to a more successful and aesthetically pleasing installation.
How Do I Securely Mount Upper Cabinets to the Wall?
To securely mount upper cabinets to the wall, start by locating the wall studs using a stud finder. Mark the stud locations and ensure the cabinets are level. Use heavy-duty screws that penetrate the studs for stability. For added support, consider using a cabinet mounting rail. Always check the manufacturer’s instructions for specific mounting guidelines.
How Do I Measure for Kitchen Upper Cabinets Installation?
To measure for kitchen upper cabinets, start by determining the desired height from the floor to the bottom of the cabinets, typically 18 inches above the countertop. Use a level to mark a straight line on the wall. Measure the width of the space where the cabinets will be installed, accounting for any obstacles like windows or outlets. Finally, measure the depth, usually 12 to 24 inches, depending on your kitchen layout. Ensure to double-check all measurements for accuracy before purchasing or installing cabinets.