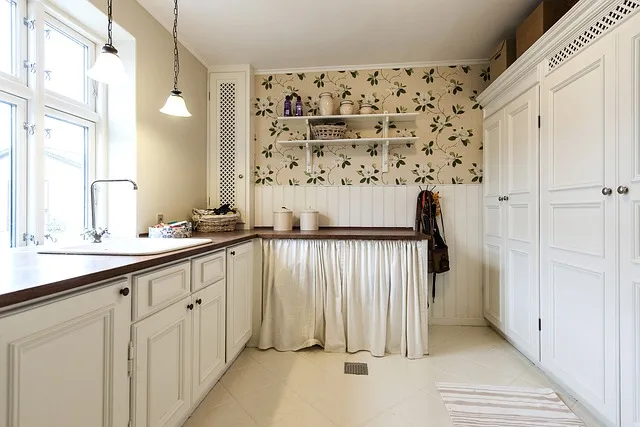
First things first, gather your tools. You’ll need a miter saw, a measuring tape, a level, and some finishing nails. Think of these tools as your trusty sidekicks, ready to help you transform your kitchen. Start by measuring the length of your cabinets. It’s like taking the measurements for a new suit—precision is key!
Once you’ve got your measurements, it’s time to cut the crown molding. This is where the miter saw comes into play. Set it to a 45-degree angle for those perfect corners. Picture yourself as a sculptor, chiseling away to create a masterpiece. Don’t forget to dry fit the pieces first; it’s like trying on clothes before buying them!
Now, let’s talk about installation. Begin at one end of your cabinets and work your way around. Use a level to ensure everything is straight—nobody wants a lopsided crown! Secure the molding with finishing nails, tapping them in gently. It’s like putting the cherry on top of a sundae; you want it to look just right.
Elevate Your Kitchen: A Step-by-Step Guide to Installing Crown Molding on Cabinets
First things first, gather your materials. You’ll need crown molding, a miter saw, a nail gun, wood glue, and a level. Think of these tools as your trusty sidekicks on this DIY adventure. Once you have everything, measure the top of your cabinets. This is where precision is key—like a chef measuring ingredients for a perfect recipe.
Next, cut your crown molding at a 45-degree angle. This might sound tricky, but it’s just like cutting a pizza; you want those clean edges to fit together seamlessly. After cutting, dry-fit the pieces to ensure they align perfectly. It’s like trying on a new outfit before heading out—make sure it looks just right!
Now, it’s time to attach the molding. Apply wood glue to the back of the molding and press it against the cabinet. Use your nail gun to secure it in place. Think of this step as giving your cabinets a stylish hat—they’ll look so much more polished!
Once everything is nailed down, fill in any gaps with caulk and sand down rough edges. This is where the magic happens; it’s like giving your cabinets a spa day. Finally, paint or stain the molding to match your kitchen’s vibe.
And just like that, you’ve transformed your kitchen into a space that feels both elegant and inviting. Who knew a little molding could make such a big difference?
Crown Your Cabinets: Expert Tips for a Flawless Crown Molding Installation
First off, preparation is key. Before you even think about cutting, make sure you measure twice and cut once. It’s like the old carpenter’s adage—getting those measurements right is crucial. Grab a good quality miter saw; it’s your best friend in this project. A clean, precise cut can make all the difference in how your molding looks once it’s up.
Next, consider the type of molding you want. There are so many styles out there, from traditional to modern. Think of it as choosing the perfect outfit for a special occasion—your crown molding should complement your cabinets and overall decor. Once you’ve picked your style, it’s time to think about the finish. A fresh coat of paint or stain can elevate the look, so don’t skip this step!
Now, let’s talk about installation. Use a level to ensure your molding is straight; nothing screams amateur like crooked lines. And don’t forget to use adhesive along with nails for extra support. It’s like using double-sided tape to keep your favorite poster from peeling off the wall—trust me, it makes a difference!

Finally, take your time with the finishing touches. Fill in any gaps with caulk and sand down rough edges. This is where the magic happens, turning your hard work into a polished masterpiece. So, roll up your sleeves and get ready to crown your cabinets with style!
Transform Your Space: The Ultimate DIY Guide to Kitchen Cabinet Crown Molding
First things first, let’s talk about materials. You’ll want to choose a lightweight, easy-to-handle molding, like polyurethane or MDF. These options are not only budget-friendly but also super easy to paint. Speaking of paint, don’t skimp on this step! A fresh coat can make your crown molding pop and tie your kitchen’s color scheme together beautifully.
Now, let’s get to the fun part—installation! Start by measuring the top of your cabinets. It’s like measuring for a new pair of shoes; you want that perfect fit! Once you’ve got your measurements, cut the molding at a 45-degree angle for those seamless corners. If you’re feeling a bit nervous about cutting, think of it as a puzzle. Each piece has its place, and when it all comes together, it’s pure magic.

When it’s time to attach the molding, grab a nail gun or some strong adhesive. It’s like giving your cabinets a stylish hat—secure and chic! And don’t forget to fill in any gaps with caulk for that polished look.
From Drab to Fab: How Crown Molding Can Revitalize Your Kitchen Cabinets
Imagine your cabinets as the canvas of your culinary masterpiece. Now, picture adding a beautiful crown molding that frames them like a work of art. It’s like giving your cabinets a stylish hat that elevates their entire look! Crown molding adds depth and character, making your kitchen feel more polished and inviting. It’s the cherry on top of your design sundae.
But wait, you might be wondering, “Is it really that easy?” Absolutely! Installing crown molding is a DIY project that can be tackled over a weekend. With a few tools and a little patience, you can create a custom look that reflects your personal style. Whether you prefer a classic, ornate design or a sleek, modern finish, there’s a crown molding style that’s perfect for you.
And let’s not forget about the practical benefits. Crown molding can help hide any gaps between your cabinets and the ceiling, giving your kitchen a seamless appearance. Plus, it can make your space feel taller and more open, which is a game-changer in smaller kitchens.
So, if you’re ready to breathe new life into your kitchen, consider crown molding. It’s an affordable way to add elegance and charm, turning your cabinets into the stars of the show. Why settle for ordinary when you can have extraordinary?
Crown Molding Made Easy: Essential Tools and Techniques for Homeowners
First things first, let’s talk tools. You don’t need a whole workshop to get started. A miter saw is your best friend here; it allows you to make precise angled cuts that are crucial for those seamless corners. If you don’t have one, a hand saw will do, but it’ll require a bit more elbow grease. You’ll also want a level to ensure everything is straight and a stud finder to locate those hidden supports in your walls. Don’t forget a good quality adhesive and finishing nails to secure your molding in place. Think of these tools as your trusty sidekicks on this DIY adventure.
Now, onto techniques! Start by measuring your walls carefully—measure twice, cut once, right? When you’re ready to cut, remember that inside corners require a different angle than outside corners. It’s like fitting puzzle pieces together; each piece has its own unique shape. If you’re feeling a bit overwhelmed, practice on some scrap wood first. It’s a great way to build confidence without the pressure.
Once you’ve got your pieces cut, it’s time to attach them. Apply adhesive to the back of the molding, press it into place, and nail it in. Use caulk to fill any gaps, and voilà! You’ve just leveled up your home’s style. So, roll up your sleeves and get ready to impress your friends with your newfound crown molding skills!
Frequently Asked Questions
What Tools Do I Need to Install Kitchen Cabinet Crown Molding?
To install kitchen cabinet crown molding, you will need a miter saw for precise angle cuts, a measuring tape for accurate measurements, a level to ensure straight installation, a nail gun or hammer for securing the molding, wood glue for added stability, and safety goggles for protection. Having these tools will help you achieve a professional finish.
What Are the Steps to Install Crown Molding on Cabinets?
To install crown molding on cabinets, first measure and cut the molding to fit the cabinet tops. Use a miter saw for precise angles, especially for corners. Next, secure the molding to the cabinets using wood glue and finishing nails. Ensure it is level and flush with the cabinet edges. Finally, fill any gaps or nail holes with wood filler, sand smooth, and paint or stain as desired for a polished finish.
How Do I Cut Crown Molding for Kitchen Cabinets?
To cut crown molding for kitchen cabinets, start by measuring the angles and lengths needed for each piece. Use a miter saw set to the appropriate angle, typically 45 degrees for corners. Ensure the molding is positioned correctly, with the back flat against the saw’s fence. Cut each piece carefully, checking for fit before final installation. Practice on scrap pieces if necessary to perfect your technique.
How Do I Measure for Kitchen Cabinet Crown Molding?
To measure for crown molding in kitchen cabinets, start by determining the height of the cabinets and the angle of the ceiling. Use a tape measure to find the width of the cabinet tops and the length of the walls where the molding will be installed. Make sure to account for any corners or angles in the walls. Record all measurements accurately to ensure a proper fit when cutting and installing the crown molding.
What Are Common Mistakes to Avoid When Installing Crown Molding?
When installing crown molding, avoid common pitfalls such as improper measuring, neglecting to use a miter saw for accurate cuts, failing to account for wall irregularities, and not securing the molding adequately. Additionally, ensure you use the right adhesive and fasteners, and consider pre-painting or finishing the molding before installation to save time and achieve a polished look.