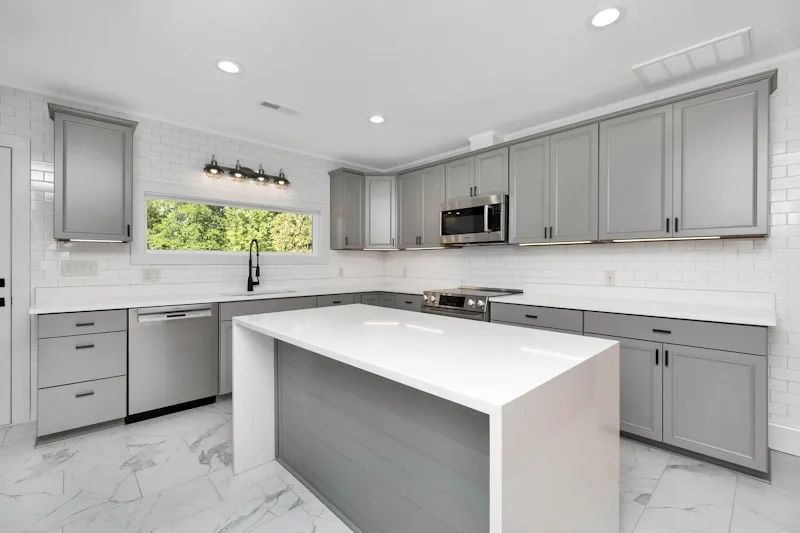
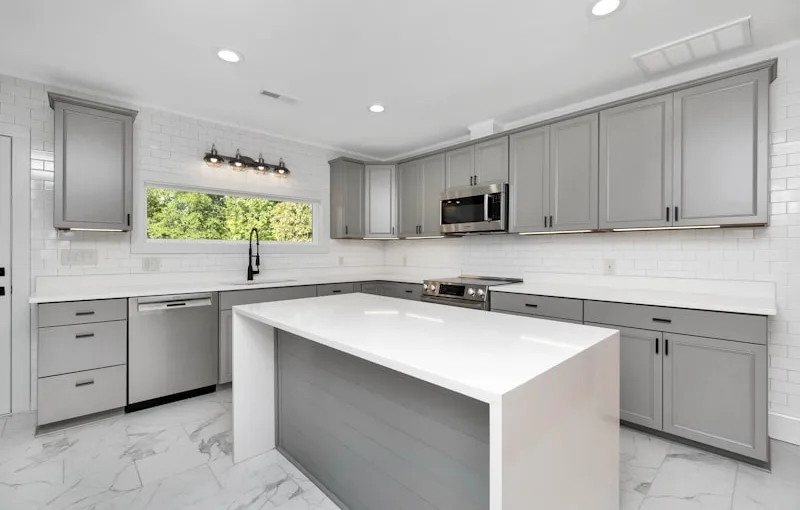
First things first, gather your tools. You’ll need a miter saw, measuring tape, a level, and some adhesive or finishing nails. Think of these tools as your trusty sidekicks on this DIY adventure. Measure the top of your cabinets carefully; precision is key here. You wouldn’t want to cut your crown moldings too short, would you?
Once you’ve got your measurements, it’s time to cut the moldings. Set your miter saw to a 45-degree angle for those corners. It’s like cutting a cake—get it just right, and it’ll look delicious! After cutting, dry-fit the pieces to ensure they fit snugly. This step is crucial; it’s your chance to make adjustments before committing.
Now, let’s talk about installation. Apply adhesive to the back of the moldings and press them firmly against the cabinets. If you’re feeling extra secure, use finishing nails to hold them in place. It’s like giving your cabinets a warm hug! Make sure everything is level; a slight tilt can throw off the entire look.
Finally, fill in any gaps or nail holes with wood filler, and sand it down for a smooth finish. A little paint or stain can add the cherry on top, making your kitchen cabinets shine like never before. So, roll up your sleeves and get ready to elevate your kitchen’s style with crown moldings!
Elevate Your Kitchen: A Step-by-Step Guide to Installing Crown Moldings on Cabinets
First things first, gather your materials. You’ll need crown molding, a miter saw, a nail gun, wood glue, and a level. Think of these tools as your trusty sidekicks on this DIY adventure. Once you have everything, it’s time to measure your cabinets. Measure twice, cut once—this old saying is golden! You don’t want to end up with a piece that’s too short or too long.
Next, it’s all about cutting those angles. Crown molding can be a bit tricky because it sits at an angle, but don’t sweat it! Set your miter saw to 45 degrees and make those cuts. Picture it like pie slices; you want them to fit together perfectly.
Now, let’s get to the fun part—installation! Start by applying wood glue to the back of the molding, then press it against the top of your cabinets. Use your nail gun to secure it in place. It’s like giving your cabinets a stylish hat! Make sure everything is level; you don’t want your crown to be lopsided.
Finally, fill in any gaps with caulk and paint or stain to match your cabinets. This is where you can really let your personality shine. Think of it as the finishing touch on a masterpiece. With just a little effort, you’ll transform your kitchen into a space that feels both elegant and inviting. So, are you ready to get started? Your dream kitchen awaits!
Crown Your Cabinets: Transform Your Kitchen with These Easy Installation Tips
Now, you might be thinking, “Crown molding? Isn’t that complicated?” Not at all! With a few easy installation tips, you can transform your kitchen into a showstopper. First off, measure your cabinets carefully. You wouldn’t want to buy a fancy dress that doesn’t fit, right? Grab a tape measure and jot down the dimensions. This will help you choose the right length of molding.
Next, let’s talk materials. You can go for wood, MDF, or even polyurethane. Each has its perks, but if you’re looking for something lightweight and easy to work with, MDF is a solid choice. It’s like the reliable friend who always shows up when you need them!
When it comes to installation, don’t sweat it. Start by cutting the molding at a 45-degree angle for those perfect corners. It’s like fitting puzzle pieces together—satisfying and rewarding! Use a nail gun or adhesive to secure the molding in place. If you’re feeling extra creative, consider painting it a contrasting color to make it pop. Imagine your cabinets wearing a stylish hat!
From Drab to Fab: How Crown Moldings Can Revitalize Your Kitchen Cabinets
Imagine your cabinets as a blank canvas. Now, picture adding a stunning crown molding that frames them like a work of art. It’s like putting a cherry on top of a sundae! Crown moldings add depth and character, creating a polished look that instantly elevates your space. They’re not just for the fancy dining rooms anymore; they’re making a splash in kitchens everywhere.
But why stop at just aesthetics? Crown moldings can also create the illusion of height, making your kitchen feel more spacious. It’s like giving your cabinets a boost, lifting them up to new heights—literally! Plus, they can hide any imperfections at the top of your cabinets, making everything look seamless and well put together.
Now, you might be wondering, “Is this a DIY project?” Absolutely! With a little patience and the right tools, you can tackle this project yourself. Just think of it as a fun weekend challenge. You’ll be amazed at how a few strips of molding can completely change the vibe of your kitchen.
So, if you’re ready to breathe new life into your cabinets, consider crown moldings. They’re the perfect blend of style and functionality, turning your kitchen into a space that feels fresh and inviting. Why settle for ordinary when you can have extraordinary? Let’s get molding!
DIY Delight: Mastering the Art of Crown Molding Installation for Kitchen Cabinets

First off, let’s talk about the materials. You’ll need some crown molding, of course, along with a miter saw, a nail gun, and a level. Think of these tools as your trusty sidekicks on this home improvement adventure. Choosing the right molding is crucial; it’s like picking the perfect outfit for a special occasion. Go for something that complements your cabinets and overall kitchen style.
Now, onto the fun part—measuring and cutting! Measure twice, cut once, right? This old adage is your best friend here. Take your time to get those angles just right; it’s like piecing together a puzzle. When you’re ready to install, start at the corners and work your way around. Use your nail gun to secure the molding in place, and don’t forget to check that it’s level. There’s nothing worse than a crooked crown!
Once everything is up, it’s time for the finishing touches. A little caulk and paint can work wonders, filling in gaps and giving your new crown molding a polished look. It’s like adding the final brush strokes to a masterpiece. And just like that, you’ve transformed your kitchen into a space that feels both inviting and luxurious. So, roll up your sleeves and get ready to impress your friends with your newfound DIY skills!
Frequently Asked Questions
How Do I Measure for Crown Moldings on Kitchen Cabinets?
To measure for crown moldings on kitchen cabinets, start by determining the height and depth of the cabinets. Use a measuring tape to find the width of each cabinet section where the molding will be installed. Record these measurements, ensuring to account for any angles or corners. It’s essential to measure accurately to ensure a proper fit and minimize waste when cutting the moldings.
How Do I Cut Crown Molding for Kitchen Cabinets?
To cut crown molding for kitchen cabinets, start by measuring the angles and lengths needed for each piece. Use a miter saw set to the appropriate angle, typically 45 degrees for corners. Ensure the molding is positioned correctly, with the back flat against the saw’s fence. Make precise cuts, and dry-fit the pieces to check alignment before final installation. Sand any rough edges and apply paint or finish as desired.
What Type of Crown Molding is Best for Kitchen Cabinets?
When selecting crown molding for kitchen cabinets, consider materials like wood or medium-density fiberboard (MDF) for durability and aesthetics. Opt for styles that complement your kitchen’s design, such as traditional, modern, or farmhouse. The best choice balances visual appeal with functionality, ensuring it enhances the overall look while being easy to maintain.
What Tools Do I Need to Install Crown Moldings on Kitchen Cabinets?
To install crown moldings on kitchen cabinets, you will need a miter saw for precise angle cuts, a nail gun or hammer for securing the moldings, wood glue for added stability, a measuring tape for accurate lengths, a level to ensure even placement, and safety goggles for protection. Optional tools include a caulking gun for finishing touches and a stud finder for locating support.
What are the Steps to Install Crown Moldings on Kitchen Cabinets?
To install crown moldings on kitchen cabinets, first measure the cabinet tops to determine the length of the moldings needed. Cut the moldings at a 45-degree angle for corners using a miter saw. Secure the moldings to the cabinets with adhesive and finish nails, ensuring they are level and aligned. Fill any gaps or nail holes with wood filler, then sand and paint or stain as desired for a polished look.
