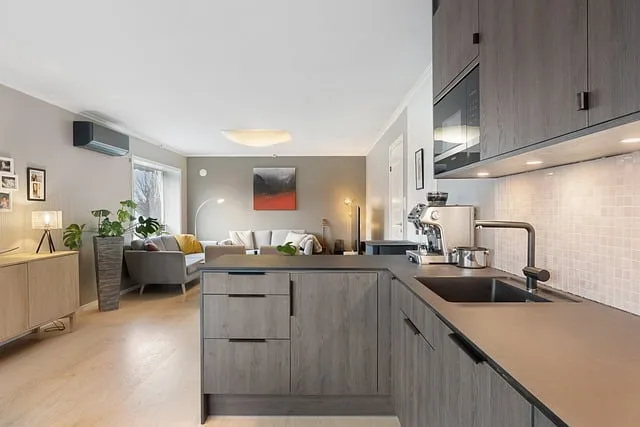
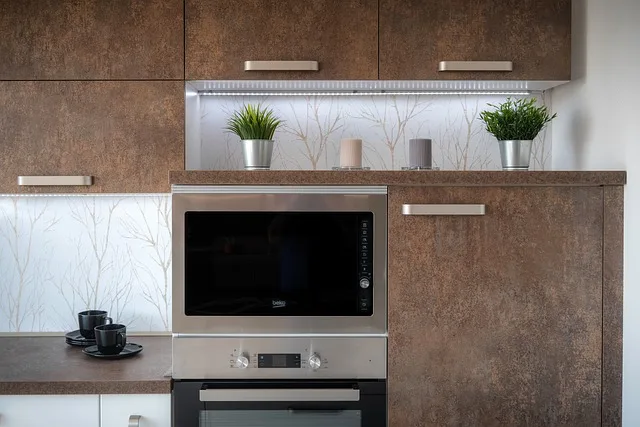
First things first, gather your tools. You’ll need a drill, a measuring tape, a level, and of course, your chosen handles. Think of this as assembling your superhero team—each tool plays a vital role in your mission to transform your kitchen!
Now, let’s talk measurements. Measure the distance between the holes on your handles. This is crucial because you don’t want to end up with handles that don’t fit! Once you have that measurement, mark the spots on your cabinets where the handles will go. A level is your best friend here; it ensures everything is straight and aligned. Nobody wants a crooked handle, right? It’s like wearing mismatched socks—just doesn’t feel right!
Next, it’s time to drill. Take a deep breath and go for it! Drill carefully at the marked spots, making sure to keep your hand steady. If you’re feeling a bit nervous, practice on a scrap piece of wood first. It’s like a dress rehearsal before the big show!
Once the holes are drilled, simply attach the handles using the screws that came with them. It’s as easy as pie! Tighten them up, but don’t go overboard—just enough to keep them secure.
And voilà! You’ve just added handles to your kitchen cabinets. It’s a small change, but it can make a world of difference in your kitchen’s overall vibe. So, what are you waiting for? Grab those tools and get started!
Transform Your Kitchen: A Step-by-Step Guide to Adding Handles to Cabinets
First things first, gather your materials. You’ll need your chosen handles, a drill, a measuring tape, a level, and a pencil. Think of this as your toolkit for a mini kitchen makeover. Now, before you start drilling holes like a mad scientist, take a moment to plan. Measure the distance between the holes on your handles and mark where they’ll go on your cabinets. This is like sketching a blueprint for your masterpiece.

Next, it’s time to drill! But hold on—don’t just go in guns blazing. Use a level to ensure your handles are straight. There’s nothing worse than a crooked handle; it’s like wearing mismatched socks! Once you’ve drilled the holes, it’s time to attach the handles. Just screw them in, and voilà! You’ve just added a touch of style and ease to your kitchen.
Now, step back and admire your handiwork. It’s amazing how something so small can make such a big difference. Your kitchen will feel more inviting, and you’ll love the ease of opening those cabinets. Plus, you can choose handles that reflect your personality—sleek and modern, or rustic and charming. It’s all about making your space feel like home. So, are you ready to transform your kitchen? Let’s get those handles on!
Handle with Care: The Ultimate DIY Guide to Kitchen Cabinet Hardware
First off, consider the style of your kitchen. Is it modern, rustic, or maybe a bit vintage? Your hardware should complement the overall vibe. For a sleek, contemporary kitchen, go for minimalist designs in brushed nickel or matte black. If your space has a farmhouse feel, opt for antique brass or ceramic knobs that add a touch of charm. It’s all about creating harmony!
Next, think about functionality. You want hardware that not only looks good but feels good too. Imagine trying to open a heavy cabinet with a tiny knob—frustrating, right? Choose pulls that are easy to grip, especially if you’re reaching for that elusive spice jar in the back.
Now, let’s talk size. Just like Goldilocks, you want your hardware to be “just right.” Too small, and it’ll get lost; too big, and it’ll overwhelm your cabinets. A good rule of thumb is to match the size of your hardware to the scale of your cabinets.
Lastly, don’t forget about installation! It’s easier than you might think. With a few basic tools, you can swap out old hardware for new in no time. Just remember to measure twice and drill once—nobody wants a crooked pull!
So, are you ready to give your kitchen a fresh look? With the right cabinet hardware, you’ll be amazed at the transformation!
From Drab to Fab: Elevate Your Kitchen Aesthetics with New Cabinet Handles
Imagine walking into your kitchen and being greeted by sleek, modern handles that catch the light just right. It’s amazing how something so small can make such a big difference. Think of your cabinet handles as the jewelry of your kitchen. Just like a stunning necklace can elevate a plain outfit, the right handles can transform your cabinets from boring to breathtaking.
Now, you might be wondering, “How do I choose the right ones?” Well, it’s all about your style. Are you going for a rustic farmhouse feel or a sleek, contemporary look? Maybe you want something quirky and fun! The options are endless, from brushed nickel to vibrant colors that pop. Picture this: a matte black handle against a white cabinet. It’s like a bold statement that says, “I’m here, and I mean business!”
And let’s not forget about functionality. New handles can make opening and closing cabinets a breeze, especially if you’re juggling a pot in one hand and a spatula in the other. Plus, they’re an affordable upgrade that doesn’t require a complete kitchen overhaul. It’s like giving your kitchen a facelift without the hefty price tag.
Unlocking Style: How to Choose and Install Handles for Your Kitchen Cabinets
First off, think about the overall theme of your kitchen. Are you going for a sleek, modern look, or something more rustic and cozy? The handles you choose should complement that aesthetic. For a contemporary kitchen, sleek stainless steel or matte black handles can add a touch of sophistication. On the flip side, if your kitchen has a farmhouse feel, consider wooden or antique brass handles that evoke warmth and charm.

Now, let’s talk about size. Just like wearing oversized sunglasses can overwhelm your face, choosing handles that are too big or too small can throw off the balance of your cabinets. A good rule of thumb is to match the size of the handle to the scale of the cabinet. If you have large, chunky cabinets, opt for larger handles to create harmony.
Installation is where the magic happens! It’s easier than you might think. Most handles come with screws, and all you need is a drill and a level. Start by marking where you want the handles to go—this is like sketching out a blueprint before building a house. Make sure they’re evenly spaced and at a comfortable height. Once you’ve drilled the holes, simply screw in the handles, and voilà! You’ve just leveled up your kitchen’s style.
So, whether you’re a DIY enthusiast or just looking to refresh your space, choosing and installing the right handles can make a world of difference. It’s all about finding that perfect fit that speaks to your personal style!
The Art of Cabinet Handles: Tips for a Seamless Kitchen Upgrade
First off, consider the style of your kitchen. Is it modern, rustic, or maybe a bit eclectic? Your cabinet handles should harmonize with the overall vibe. For a sleek, contemporary kitchen, opt for minimalist handles in brushed nickel or matte black. They’re like the cool kids at school—effortlessly stylish and always in vogue. On the flip side, if your kitchen has a farmhouse charm, go for vintage-inspired handles with intricate designs. They add a touch of warmth, like a cozy hug on a chilly day.
Next, think about functionality. You want handles that not only look good but feel good too. Imagine trying to open a heavy cabinet with a tiny, awkward handle—it’s like trying to squeeze into your favorite jeans after the holidays! Choose handles that are comfortable to grip and easy to use, especially if you’re cooking up a storm.
Don’t forget about the finish! A shiny chrome handle can add a pop of glam, while a matte finish can create a more subdued, sophisticated look. It’s all about balance. And here’s a pro tip: mixing finishes can create a unique, layered look, just like mixing different fabrics in an outfit.
Lastly, don’t shy away from experimenting. Sometimes, the best ideas come from thinking outside the box. Try oversized handles for a bold statement or even colorful options to inject some personality into your kitchen. After all, your kitchen should reflect you—quirks and all!
DIY Delight: Adding Handles to Kitchen Cabinets Made Easy
Let’s face it, handles aren’t just functional; they can also be a game-changer for your kitchen’s style. Think of them as the jewelry that completes your outfit. With a little creativity and some basic tools, you can elevate your cabinets from drab to fab in no time.
First things first, gather your materials. You’ll need handles, a drill, screws, and a measuring tape. Don’t worry if you’re not a DIY expert; this project is as easy as pie! Start by measuring where you want the handles to go. A good rule of thumb is to place them about 2-3 inches from the top or bottom of the cabinet door.
Once you’ve marked your spots, it’s time to drill. Just like slicing through a warm loaf of bread, a steady hand will make this part a breeze. After drilling, simply attach the handles with screws. Voila! You’ve just added a touch of personality to your kitchen.
But wait, there’s more! Choosing the right handles can really set the mood. Whether you prefer sleek modern designs or rustic vintage vibes, the options are endless. It’s like picking the perfect toppings for your pizza—everyone has their own taste!
Frequently Asked Questions
Can I Install Cabinet Handles on My Own?
Installing cabinet handles on your own is a straightforward DIY task that requires minimal tools. With basic skills, you can enhance your cabinets’ appearance and functionality. Ensure you measure and mark the correct placement for the handles, drill holes carefully, and secure them tightly for a professional finish.
How Do I Measure for Proper Handle Placement?
To ensure proper handle placement, measure the height from the floor to the point where the handle will be installed. Consider the user’s height and reach for optimal comfort. For doors, the standard height is typically 36 to 48 inches from the floor. For cabinets, handles are usually placed 2 to 3 inches from the top or bottom edge. Always double-check measurements before installation.
How Do I Choose the Right Handles for My Kitchen Cabinets?
Selecting the appropriate handles for kitchen cabinets involves considering style, material, size, and functionality. Match the handles to your kitchen’s overall design theme, whether modern, traditional, or rustic. Choose durable materials like stainless steel or brass for longevity. Ensure the size of the handles complements the cabinet dimensions and is comfortable to use. Finally, consider the ease of installation and maintenance to enhance both aesthetics and practicality.
What Are the Best Practices for Installing Kitchen Cabinet Handles?
To ensure a professional and functional installation of kitchen cabinet handles, start by measuring and marking the desired height and position for each handle. Use a level to maintain alignment and ensure uniformity across all cabinets. Pre-drill holes to prevent wood splitting and facilitate easier installation. Choose the right size and style of handles that complement your kitchen design. Finally, tighten screws securely but avoid over-tightening to prevent damage.
What Tools Do I Need to Install Cabinet Handles?
To install cabinet handles, you will need a few essential tools: a drill or screwdriver for fastening, a measuring tape for accurate placement, a level to ensure alignment, and a pencil for marking drill points. Optional tools include a chisel for adjustments and a stud finder if you’re installing on a wall. Having these tools ready will make the installation process efficient and straightforward.