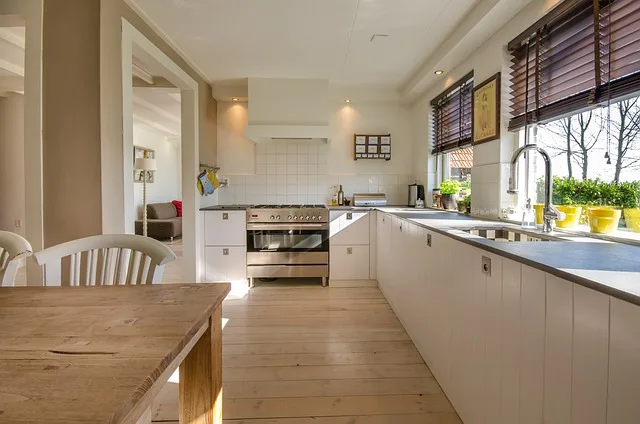
First things first, gather your materials. You’ll need plywood, wood glue, screws, and some basic tools like a saw, drill, and measuring tape. Think of it like building a puzzle; each piece needs to fit just right. Start by measuring your kitchen space. Knowing the dimensions is crucial—after all, you don’t want your beautiful new cabinets to end up looking like they belong in a dollhouse!
Once you’ve got your measurements, it’s time to cut the plywood. This is where the magic begins! Cut the pieces for the sides, top, bottom, and shelves. Picture it like crafting a sturdy box; each side supports the others. After cutting, assemble the pieces using wood glue and screws. This is where you can really get creative—add some decorative touches or unique designs that reflect your style.
Now, let’s talk about finishing. Sand down any rough edges to give your cabinets a smooth, polished look. You can paint or stain them to match your kitchen’s vibe. Think of it as giving your cabinets a fresh coat of personality!
Crafting Your Dream Kitchen: A Step-by-Step Guide to Building Custom Cabinets

First off, you need a vision. Picture your ideal kitchen: what colors, styles, and materials speak to you? Are you dreaming of sleek modern lines or cozy rustic charm? Jot down your ideas and gather inspiration from Pinterest or home improvement shows. This is your canvas, so let your imagination run wild!
Next, it’s time to measure. Grab that tape measure and get to work! Accurate measurements are crucial. You don’t want to end up with cabinets that are too big or too small. Think of it like fitting a puzzle piece; everything needs to align perfectly.

Now, let’s talk materials. Wood, plywood, or MDF? Each has its pros and cons. If you’re after durability and a classic look, solid wood is your best bet. But if you’re on a budget, plywood can still give you a beautiful finish without breaking the bank.
Once you’ve settled on materials, it’s time to design. Sketch out your cabinet layout, considering functionality and flow. Think about how you use your kitchen. Do you need more storage for pots and pans, or maybe a special spot for your spice collection?
From Blueprint to Beauty: Transform Your Space with DIY Kitchen Cabinets
First off, let’s talk about the thrill of creating something with your own hands. Picture this: you sketch out your vision, maybe a rustic farmhouse vibe or a sleek modern look. That blueprint is your roadmap, guiding you through the transformation. It’s not just about slapping some paint on old cabinets; it’s about crafting a space that reflects who you are.
Now, let’s dive into the nitty-gritty. Start by choosing the right materials. Think of wood as the backbone of your project. Whether you opt for sturdy plywood or elegant hardwood, each choice adds character. And don’t forget about the finish! A fresh coat of paint or a rich stain can breathe new life into your cabinets, making them pop like a cherry on top of a sundae.
But wait, there’s more! Hardware can be the jewelry of your kitchen. Swapping out old knobs and handles for something chic can elevate your cabinets from drab to fab in an instant. It’s like giving your kitchen a mini makeover without breaking the bank.
Unlock Your Inner Craftsman: Essential Tips for Making Kitchen Cabinets at Home
First off, planning is key. Think of it like drawing a treasure map; you need to know where you’re going before you start digging! Measure your kitchen carefully and sketch out your cabinet design. This will help you visualize the end result and avoid any costly mistakes.
Next, choose your materials wisely. Solid wood is a classic choice, but don’t overlook plywood or MDF for a budget-friendly option. Each material has its own charm, just like different spices in a recipe. The right choice can elevate your cabinets from ordinary to extraordinary!
Now, let’s talk tools. You don’t need a full workshop to get started, but having the basics—like a saw, drill, and sander—will make your life a lot easier. Think of these tools as your trusty sidekicks, ready to help you tackle any challenge that comes your way.
When it comes to assembly, take your time. Rushing can lead to wobbly cabinets that just won’t stand the test of time. It’s like building a house of cards; one wrong move, and everything comes crashing down!
Finally, don’t forget the finishing touches. A fresh coat of paint or stain can make your cabinets pop, giving them that professional look. It’s like adding the cherry on top of a sundae—totally transforms the whole experience!
The Ultimate Kitchen Upgrade: How to Build Stylish and Functional Cabinets
So, how do you go about building these dream cabinets? First off, think about your style. Are you leaning towards a sleek modern look, or do you prefer the warmth of rustic charm? Choosing the right materials is crucial. Solid wood offers durability and a timeless appeal, while plywood can be a budget-friendly alternative that still looks great.
Next, let’s talk functionality. You want cabinets that work for you, not against you. Consider incorporating pull-out shelves or lazy Susans to maximize your space. It’s like having a personal assistant in your kitchen, making sure everything is within reach and organized. And don’t forget about the hardware! Stylish knobs and handles can add that extra flair, making your cabinets pop like the cherry on top of a sundae.
Now, let’s not overlook the color. A fresh coat of paint can breathe life into your cabinets. Whether you go bold with a deep navy or keep it classic with crisp white, the right color can set the mood for your entire kitchen. Think of it as the backdrop to your culinary adventures.
Lastly, don’t shy away from personal touches. Open shelving can showcase your favorite dishes or cookbooks, turning your kitchen into a gallery of your culinary journey. Building stylish and functional cabinets isn’t just about storage; it’s about creating a space that reflects who you are and inspires you to whip up your next masterpiece.
Cabinet-Making 101: A Beginner’s Guide to Creating Your Own Kitchen Storage
First off, don’t let the idea of cabinet-making intimidate you. Think of it like building a puzzle; each piece fits together to create something functional and stunning. Start by sketching out your dream cabinets. What style do you envision? Modern, rustic, or maybe a blend of both? Visualizing your project is half the battle won!
Next, let’s talk materials. Plywood is a fantastic choice for beginners—it’s sturdy, easy to work with, and won’t break the bank. Plus, it’s like the bread and butter of cabinet-making! You’ll also need some basic tools: a saw, drill, and measuring tape. Trust me, having the right tools is like having a magic wand in your hands.
Now, onto the fun part: assembly! Begin by cutting your pieces according to your measurements. It’s like baking a cake; you need the right proportions for it to rise beautifully. Once you’ve got your pieces, it’s time to put them together. Use wood glue and screws to secure everything. Think of it as building a strong foundation for a house—everything needs to be solid!
Finally, don’t forget about the finishing touches. Sanding and painting your cabinets can elevate them from basic to breathtaking. Imagine your kitchen with freshly painted cabinets that pop with color! It’s all about making your space feel like home. So, roll up your sleeves, unleash your creativity, and get ready to impress yourself with your very own kitchen storage!
Sustainable Style: How to Make Eco-Friendly Kitchen Cabinets from Reclaimed Materials
First off, what exactly are reclaimed materials? Think of them as the superheroes of the building world—old wood from barns, pallets, or even furniture that’s seen better days. By giving these materials a second life, you’re not only reducing waste but also adding character and history to your kitchen. It’s like wearing a vintage jacket; it tells a story!
Now, how do you get started? Begin by sourcing your reclaimed wood. Check out local salvage yards, flea markets, or even online marketplaces. You might stumble upon some hidden gems that will make your cabinets truly one-of-a-kind. Once you’ve gathered your materials, it’s time to get creative. Sand down the wood to reveal its natural beauty, and don’t shy away from imperfections—those knots and scars add charm!
Next, consider the design. Are you leaning towards a rustic farmhouse vibe or a sleek modern look? The beauty of reclaimed wood is its versatility. You can mix and match styles, creating a kitchen that reflects your personality. Plus, using eco-friendly finishes like natural oils or water-based paints will keep those cabinets looking fresh while being kind to the environment.
Finally, let’s talk about installation. If you’re handy, you can tackle this project yourself, or you might want to enlist a friend or a professional. Either way, the satisfaction of stepping back and admiring your eco-friendly kitchen cabinets will be worth every effort. So, are you ready to transform your kitchen into a sustainable masterpiece?
Frequently Asked Questions
What Tools Are Essential for Cabinet Construction?
Essential tools for cabinet construction include a table saw for precise cuts, a miter saw for angled cuts, a drill for making holes and driving screws, a router for shaping edges, clamps for holding pieces together, and a level to ensure everything is straight. Having these tools will facilitate accurate and efficient cabinet building.
What Materials Do I Need to Make Kitchen Cabinets?
To make kitchen cabinets, you will need materials such as plywood or MDF for the cabinet boxes, solid wood or veneer for the doors, and hardware like hinges and drawer slides. Additionally, you may require screws, wood glue, and finishing materials like paint or stain.
How Do I Finish and Paint My Kitchen Cabinets?
To finish and paint your kitchen cabinets, start by removing all hardware and cleaning the surfaces thoroughly. Sand the cabinets to create a smooth base and ensure better paint adhesion. Apply a primer suitable for your cabinet material, followed by your chosen paint, using a brush or spray for an even finish. Allow adequate drying time between coats, and consider applying a protective topcoat for durability. Reattach hardware once fully dry.
What Are the Steps to Install Kitchen Cabinets Properly?
To install kitchen cabinets properly, start by measuring the space and planning the layout. Ensure the wall is level and mark the stud locations. Install a ledger board to support the cabinets during installation. Begin with the upper cabinets, securing them to the wall studs, and then proceed to the lower cabinets, ensuring they are level and aligned. Finally, attach the cabinets to each other and to the wall for stability, and finish with any necessary trim or hardware.
How Do I Measure for Custom Kitchen Cabinets?
To measure for custom kitchen cabinets, start by measuring the width, height, and depth of the space where the cabinets will be installed. Use a tape measure to get accurate dimensions, noting any obstacles like windows, doors, or plumbing. Record the measurements in inches and consider the layout, ensuring to account for any desired cabinet styles and configurations. This will help ensure a perfect fit for your custom cabinets.