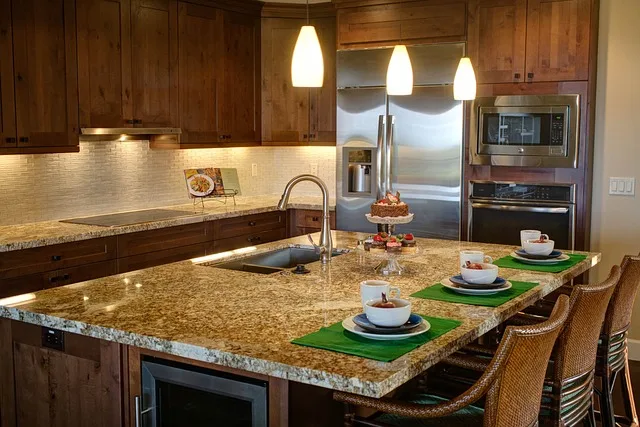
First off, gather your supplies. You’ll need some white paint (water-based is best), water, a mixing container, a brush or rag, and sandpaper. Think of the paint as your canvas and the cabinets as your masterpiece waiting to happen. Start by cleaning your cabinets thoroughly; you want to remove any grease or grime that could mess with your beautiful finish.
Next, it’s time to mix your paint. Combine equal parts of paint and water in your container. This mixture is your magic potion—it’ll give your cabinets that soft, translucent look that whitewashing is all about. Now, grab your brush or rag and start applying the mixture. Work in small sections, and don’t be afraid to get a little messy! The beauty of whitewashing is that it’s meant to be imperfect.
As you apply the mixture, think of it like spreading frosting on a cake—smooth it out, but let some of the wood grain peek through. This adds character and depth to your cabinets. If you want a more intense look, just add another coat after the first one dries.
Once you’re satisfied with the coverage, let it dry completely. Sanding lightly between coats can help achieve that perfect finish. Finally, seal your work with a clear topcoat to protect your newly whitewashed cabinets from the hustle and bustle of kitchen life. And just like that, you’ve transformed your kitchen into a bright, airy space that feels brand new!
Transform Your Space: A Step-by-Step Guide to Whitewashing Kitchen Cabinets
First things first, gather your supplies. You’ll need white paint (water-based is best), a paintbrush, a rag, and some sandpaper. Think of this as your toolkit for a mini-makeover. Now, before you start slapping paint on, give those cabinets a good clean. Dust and grease are like party crashers—they’ll ruin your transformation if you don’t kick them out first!
Once your cabinets are squeaky clean, it’s time to sand them down lightly. This step is like giving your cabinets a gentle exfoliation, helping the paint stick better. Don’t worry; you don’t need to strip them bare—just a light scuff will do.
Now, mix your white paint with a bit of water. You want a consistency that’s more like a wash than a full-on coat. Think of it as a light veil rather than a heavy blanket. Using your brush, apply the mixture in long, even strokes. This is where the magic happens! As you paint, wipe off excess with your rag to achieve that beautiful, weathered look.
From Drab to Fab: The Art of Whitewashing Kitchen Cabinets for a Fresh Look
Imagine your kitchen as a blank canvas. Whitewashing is like adding a splash of color that breathes new life into your space. It’s not just about slapping on some paint; it’s an art form that allows the natural wood grain to peek through, giving your cabinets a soft, rustic charm. Think of it as giving your cabinets a sun-kissed glow, making them look effortlessly chic.
So, how do you get started? First, gather your supplies: a good quality white paint, a brush, and a rag. The beauty of whitewashing is in its simplicity. You don’t need to be a DIY expert to achieve stunning results. Just mix your paint with water to create a thin, translucent mixture. This is where the fun begins!
Start brushing the mixture onto your cabinets, working in sections. Don’t worry about perfection; the goal is to create a soft, inviting look. Use the rag to wipe away excess paint, allowing the wood’s character to shine through. It’s like giving your cabinets a gentle spa day!
Whitewashing 101: Revitalize Your Kitchen Cabinets with This Simple Technique

Whitewashing is like giving your cabinets a stylish, sun-kissed glow. It’s not just about slapping on a coat of white paint; it’s an art form that allows the natural wood grain to peek through, creating a beautiful, textured finish. Think of it as a gentle kiss of color that enhances rather than hides the wood’s character. Plus, it’s super easy to do!
First, gather your supplies: a good quality white paint, water, a brush, and some sandpaper. Mix the paint with water to create a thin, translucent wash. The ratio? About one part paint to two parts water works wonders. Now, grab that brush and start applying the mixture to your cabinets. Don’t worry about being perfect; the beauty of whitewashing lies in its imperfections.
As you brush on the wash, you’ll notice how the wood grain starts to shine through, giving your cabinets a rustic yet modern vibe. If you want a more intense look, just add another layer. It’s like building a delicious cake—each layer adds depth and flavor!
Once you’re satisfied with the look, let it dry, and then lightly sand the edges for a distressed finish. This step is like adding the cherry on top, giving your cabinets that charming, lived-in feel. So, are you ready to roll up your sleeves and give your kitchen a fabulous makeover? Whitewashing is your ticket to a stunning transformation!
The Ultimate DIY Project: How to Whitewash Your Kitchen Cabinets Like a Pro

First off, gather your supplies. You’ll need some white paint, water, a brush, and a rag. Think of the paint as your canvas and the cabinets as your masterpiece waiting to happen. Mix equal parts of paint and water to create that perfect wash. It’s like making a smoothie—too thick, and it won’t blend; too thin, and it’ll be a mess.
Now, here comes the fun part! Start applying the mixture with your brush, working in sections. Don’t stress about being perfect; the beauty of whitewashing is its charming imperfections. Use your rag to wipe away excess paint, revealing the wood grain underneath. It’s like peeling back the layers of an onion—each swipe uncovers something beautiful.
As you go along, take a step back and admire your work. Are you feeling that rush of excitement? That’s the magic of DIY! If you want a more distressed look, just sand down some areas lightly. It’s like giving your cabinets a little character, making them look like they’ve been loved for years.
Finally, seal the deal with a clear topcoat to protect your hard work. This step is like putting on a protective layer of armor, ensuring your cabinets stay stunning for years to come. So, roll up your sleeves and get ready to transform your kitchen into a space that feels brand new!
Brighten Up Your Kitchen: Expert Tips for Perfectly Whitewashed Cabinets
First off, prep is key. Think of it like getting ready for a big date; you wouldn’t just throw on any outfit! Start by cleaning your cabinets thoroughly. A mix of warm water and mild soap works wonders. This step is crucial because any grease or grime will ruin your whitewash finish. Once they’re clean, give them a light sanding. It’s like giving your cabinets a mini spa day—smooth and ready for their glow-up!
Now, let’s talk about the whitewash itself. You can create a stunning whitewash by mixing water with your favorite white paint. The ratio? Think of it like a cocktail—more water for a lighter look, more paint for a bolder finish. Test it out on a small area first. It’s like tasting your dish before serving; you want to make sure it’s just right!
When applying the whitewash, use a brush or a rag, and work in sections. This is where the magic happens! Apply it in thin layers, allowing each coat to dry before adding more. It’s like building a cake—layer by layer, you create something beautiful. And don’t forget to seal the deal with a clear topcoat. This will protect your cabinets and keep that fresh look for years to come.
So, are you ready to transform your kitchen into a bright, inviting space? With these tips, you’ll be well on your way to achieving those perfectly whitewashed cabinets that make your heart sing!
Say Goodbye to Dull Cabinets: Discover the Magic of Whitewashing
So, what exactly is whitewashing? Think of it as giving your cabinets a refreshing, airy makeover. Instead of a heavy, opaque paint job, whitewashing allows the natural wood grain to peek through, creating a soft, rustic vibe. It’s like putting on a light, breezy outfit instead of a heavy winter coat—much more inviting, right?
Now, you might be wondering how to get started. The beauty of whitewashing is that it’s super simple! All you need is some white paint, water, and a brush. Mix the paint with water to create a thin, translucent wash. Then, apply it to your cabinets, wiping off any excess to achieve that perfect, sun-kissed look. It’s like giving your cabinets a gentle sunbath!
But wait, there’s more! Whitewashing isn’t just about aesthetics; it’s also a fantastic way to protect your cabinets. The paint adds a layer of durability, helping to fend off scratches and stains. Plus, it’s an eco-friendly option, especially if you choose low-VOC paints. You’re not just beautifying your home; you’re also making a smart choice for the environment.
So, are you ready to say goodbye to those dull cabinets? With whitewashing, you can create a warm, inviting atmosphere that feels like home. It’s time to unleash your creativity and let your cabinets shine!
Frequently Asked Questions
Do I need to sand my cabinets before whitewashing?
Sanding cabinets before whitewashing is recommended to ensure better adhesion of the whitewash. It helps to remove any existing finish and creates a smoother surface, allowing the whitewash to penetrate more effectively and achieve a more even appearance.
How long does whitewashing kitchen cabinets take?
The time required to whitewash kitchen cabinets varies based on the size of the kitchen and the number of cabinets. Generally, the process can take anywhere from a few hours to a couple of days, including preparation, application, and drying time. Proper planning and execution can help ensure a smooth and efficient project.
Can I whitewash over stained or painted cabinets?
Yes, you can whitewash over stained or painted cabinets, but proper preparation is essential. Clean the surface thoroughly, and if the existing finish is glossy, lightly sand it to ensure better adhesion. Apply a whitewash mixture, adjusting the ratio of paint to water for desired opacity. Test on a small area first to achieve the desired look.
What materials do I need for whitewashing kitchen cabinets?
To whitewash kitchen cabinets, you will need the following materials: white paint or whitewash solution, a paintbrush or roller, sandpaper for surface preparation, a clean cloth for wiping, and a clear sealant for protection. Optionally, you may also want a primer if the cabinets are dark or stained.
What is the best method to whitewash kitchen cabinets?
To effectively whitewash kitchen cabinets, start by cleaning the surfaces thoroughly. Sand the cabinets lightly to create a better bond for the paint. Choose a whitewash stain or a diluted white paint for a translucent finish. Apply the mixture with a brush or cloth, working in small sections, and wipe off excess for a softer look. Finish with a clear topcoat for durability.