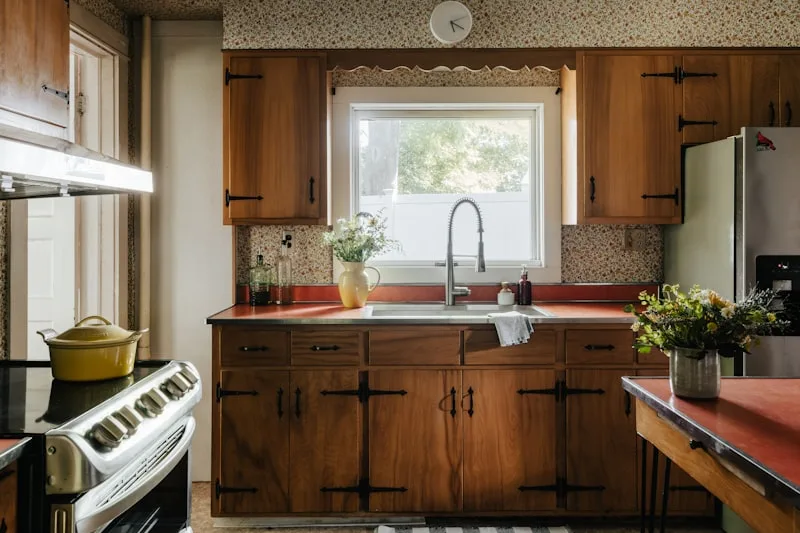
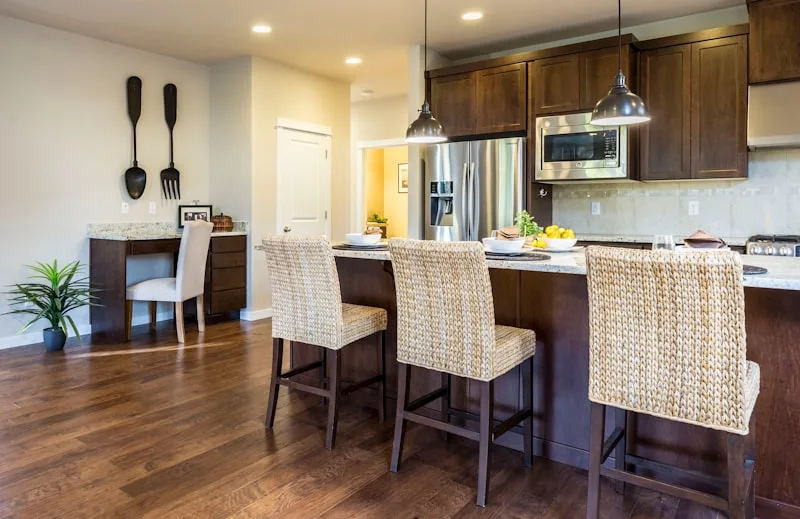
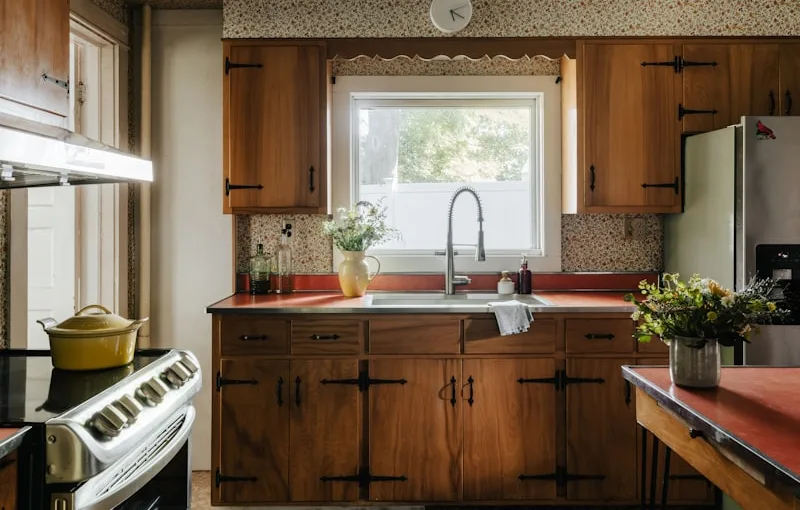
First off, consider a fresh coat of paint. It’s like putting on a new outfit! Choose a color that complements your kitchen’s vibe—maybe a soft white for a classic look or a bold navy for something more modern. Just make sure to prep the surface by cleaning and sanding it down; this step is crucial for that smooth finish.
Next, think about hardware. Swapping out old knobs and handles can make a world of difference. It’s like adding accessories to an outfit; the right hardware can elevate your cabinets from drab to fab. Opt for sleek, contemporary designs or go for vintage charm—whatever suits your style!
If you’re feeling adventurous, consider adding some open shelving. This is a fantastic way to showcase your favorite dishes or decorative items. It’s like giving your cabinets a little personality! Just be sure to keep it organized; a cluttered shelf can quickly turn into an eyesore.
Lastly, don’t underestimate the power of new lighting. Under-cabinet lights can highlight your beautiful updates and create a warm, inviting atmosphere. Think of it as the finishing touch that ties everything together.
So, whether you’re painting, changing hardware, or adding shelves, updating your old kitchen cabinets can transform your space into something you’ll love. It’s all about making those cabinets reflect your unique style and personality!
Revamp Your Space: 7 Creative Ways to Update Old Kitchen Cabinets

First off, how about a splash of color? Painting your cabinets can work wonders. Imagine your kitchen bathed in a vibrant hue that reflects your personality. It’s like giving your cabinets a fresh coat of confidence! If you’re feeling adventurous, consider two-tone cabinets—pairing a bold color with a classic white can create a stunning contrast.
Next, let’s talk hardware. Swapping out old knobs and handles for trendy ones is like giving your cabinets a stylish accessory. Think of it as dressing up your cabinets for a night out! Whether you prefer sleek modern designs or rustic vintage styles, the right hardware can make a world of difference.
If you’re into DIY, why not try adding some open shelving? Removing a few cabinet doors can create an airy feel and showcase your favorite dishes or decorative items. It’s like turning your kitchen into a gallery of your culinary treasures!
Another idea is to use contact paper or adhesive wallpaper. This is a game-changer! You can easily apply it to the cabinet surfaces for a chic, patterned look. It’s like giving your cabinets a trendy outfit without the commitment.
Lastly, consider adding some lighting. Under-cabinet lights can illuminate your workspace and highlight your beautiful cabinets. It’s like putting your kitchen in the spotlight!
So, are you ready to roll up your sleeves and give your kitchen cabinets the makeover they deserve? With these creative ideas, your kitchen will be the talk of the town!
From Drab to Fab: Transforming Your Kitchen Cabinets on a Budget
First off, let’s talk paint. A fresh coat can work wonders! Think of it as giving your cabinets a new outfit. Choose a color that speaks to you—maybe a bold navy or a soft sage green. It’s like dressing your cabinets for a night out! Just make sure to prep the surface well; a little sanding goes a long way in ensuring that paint sticks like glue.
Now, if you’re not into painting, how about some contact paper? It’s like a magic trick for your cabinets. You can find it in all sorts of patterns and colors. Just peel, stick, and voilà! Your cabinets will look like they’ve had a complete makeover without breaking the bank.
Next up, let’s chat hardware. Swapping out old knobs and handles is like giving your cabinets a shiny new accessory. It’s amazing how a simple change can elevate the entire look. Opt for modern brass or vintage-style pulls to add that extra flair. It’s like putting on the perfect pair of shoes to complete your outfit!
And don’t forget about decluttering! Sometimes, the best transformation comes from within. Clear out the clutter, and you’ll be surprised at how much more spacious and inviting your kitchen feels. It’s like giving your cabinets a breath of fresh air.
So, are you ready to turn your kitchen from drab to fab? With a little creativity and some elbow grease, you can create a space that feels brand new without emptying your wallet!
DIY Cabinet Makeover: Step-by-Step Guide to Refreshing Your Kitchen
First things first, gather your supplies. You’ll need sandpaper, primer, paint (or stain), brushes, and some good old-fashioned cleaning supplies. Think of this as your treasure map; each item is a clue leading you to a stunning kitchen transformation. Start by emptying your cabinets and giving them a thorough clean. You wouldn’t paint a canvas without prepping it, right?
Next, it’s time to sand those surfaces. This step is crucial! Sanding helps the paint stick better, ensuring a smooth finish. Picture it like giving your cabinets a fresh haircut—clean and ready for styling. Once you’ve sanded, wipe away the dust and apply a coat of primer. This is like laying down a solid foundation for a house; it sets the stage for everything that follows.
Now comes the fun part—painting! Choose a color that speaks to you. Whether it’s a bold navy or a soft pastel, let your personality shine through. Apply the paint in thin, even coats, allowing each layer to dry completely. It’s like building a cake; each layer adds to the overall deliciousness!
While the paint dries, consider updating your hardware. New knobs or handles can be the cherry on top of your cabinet makeover. They’re like the accessories that complete an outfit, adding that perfect finishing touch.
Once everything is dry and set, it’s time to put everything back in place. Stand back and admire your handiwork! Your kitchen has transformed into a space that feels fresh and inviting, all thanks to your DIY spirit. So, what are you waiting for? Grab those supplies and let the makeover magic begin!
The Ultimate Guide to Updating Old Kitchen Cabinets: Tips and Tricks
First off, consider a fresh coat of paint. It’s like a magic wand for your cabinets! Choose a color that complements your kitchen’s vibe—maybe a soft white for a classic look or a bold navy for a modern twist. Just make sure to prep your surfaces well; a little sanding goes a long way in ensuring that paint sticks like glue.
Next, think about hardware. Swapping out old knobs and handles is like putting on the perfect accessory. It can completely change the look of your cabinets. Opt for sleek, modern pulls or vintage-inspired knobs to match your style. You’d be surprised how such a small change can make a big impact!
If you’re feeling adventurous, consider adding some open shelving. It’s like letting your cabinets breathe! This not only showcases your favorite dishes but also creates an airy feel in your kitchen. Plus, it’s a great way to declutter and keep things organized.
Lastly, don’t underestimate the power of lighting. Under-cabinet lights can highlight your newly updated cabinets and create a warm, inviting atmosphere. It’s like adding a spotlight to your culinary stage!
So, are you ready to roll up your sleeves and give your kitchen cabinets the makeover they deserve? With a little creativity and effort, you can turn those tired old cabinets into the star of your kitchen!
Breathe New Life into Your Kitchen: Innovative Ideas for Cabinet Upgrades
First off, consider a splash of color. Painting your cabinets can transform the entire vibe of your kitchen. Think about a bold navy blue or a soft sage green—colors that can make your cabinets pop and create a warm atmosphere. It’s like giving your kitchen a new outfit; suddenly, it feels brand new!
Next, let’s talk hardware. Swapping out old knobs and handles for sleek, modern designs can make a world of difference. It’s the little things that count, right? Picture shiny brass or matte black fixtures that catch the light just right. They’re like the jewelry of your cabinets, adding that perfect finishing touch.
If you’re feeling adventurous, how about open shelving? Removing some cabinet doors can create an airy feel and showcase your favorite dishes or quirky kitchen gadgets. It’s like inviting your personality into the space! Plus, it makes it easier to grab what you need without rummaging through cluttered cabinets.
Lastly, consider adding some smart storage solutions. Pull-out shelves, lazy Susans, or even built-in spice racks can maximize your space and keep everything organized. It’s like giving your kitchen a little makeover that not only looks good but also works hard for you.
So, are you ready to transform your kitchen into a space that inspires creativity and joy? With these innovative cabinet upgrades, you’ll be well on your way to a kitchen that feels brand new!
Sustainable Style: Eco-Friendly Methods to Update Your Kitchen Cabinets
First off, consider a little paint magic. Instead of tossing those old cabinets, grab some non-toxic, low-VOC paint. It’s like giving your cabinets a spa day! A fresh coat can transform them from blah to beautiful in no time. Plus, you’ll be reducing harmful emissions in your home. Talk about a win-win!
If you’re feeling a bit more adventurous, why not try a DIY refacing project? You can replace just the doors or add some reclaimed wood accents. Imagine the stories those reclaimed pieces could tell! It’s a fantastic way to add character while keeping waste out of landfills.
Now, let’s chat about hardware. Swapping out old knobs and handles for something more modern can make a world of difference. Look for options made from sustainable materials like bamboo or recycled metals. It’s like giving your cabinets a stylish accessory that’s also eco-conscious.
And don’t forget about organization! Installing eco-friendly organizers can maximize your space and reduce clutter. Think of it as giving your kitchen a breath of fresh air. You’ll be amazed at how much more functional your kitchen can be with a few thoughtful changes.
So, whether you’re painting, refacing, or simply updating hardware, there are plenty of sustainable ways to refresh your kitchen cabinets. It’s all about making choices that reflect your style while caring for our planet. Who knew updating your kitchen could feel so good?
Cabinet Revival: How to Choose the Right Paint and Finish for a Modern Look
First off, think about the color. You want something that not only complements your space but also reflects your personality. Light colors like soft whites or pale grays can make your kitchen feel airy and spacious, while bold hues like navy or forest green can add a touch of drama. Imagine your cabinets as the canvas of your kitchen masterpiece—what story do you want them to tell?
Next, let’s talk about the finish. This is where the magic happens! A satin or semi-gloss finish is often the go-to for a modern vibe. Why? Because it’s durable and easy to clean, perfect for those inevitable splatters and spills. Think of it as the protective shield that keeps your cabinets looking fresh and fabulous. If you’re feeling adventurous, a matte finish can also work wonders, giving your cabinets a chic, understated elegance. Just remember, matte finishes can be a bit trickier to maintain.

Now, don’t forget about the primer! It’s like the foundation of your cabinet makeover. A good primer not only helps the paint adhere better but also ensures that the true color shines through. It’s the unsung hero of your project, setting the stage for that stunning transformation.
Lastly, consider the type of paint. Water-based paints are popular for their low odor and quick drying time, while oil-based paints offer a rich finish and durability. Think of it as choosing between a quick coffee run or a leisurely brunch—both have their perks, but it depends on your lifestyle and needs.
Frequently Asked Questions
What Materials Do I Need to Update Kitchen Cabinets?
To update kitchen cabinets, you will need sandpaper, primer, paint or stain, brushes or rollers, a paint sprayer (optional), cabinet hardware (handles and knobs), and a clean cloth. Additionally, consider using wood filler for repairs and a protective topcoat for durability.
What Are the Best Techniques for Updating Cabinet Hardware?
To effectively update cabinet hardware, start by selecting the right style and finish that complements your decor. Measure existing holes to ensure new hardware fits without additional drilling. Use a level to align handles and knobs for a professional look. Consider using a template for consistent placement. Finally, securely attach the new hardware, ensuring it operates smoothly.
Is Painting or Staining Better for Old Cabinets?
Choosing between painting and staining for old cabinets depends on the desired finish and the condition of the wood. Painting offers a solid color and can hide imperfections, while staining enhances the natural grain and texture. If the cabinets are in good shape and you want to maintain their character, staining is ideal. For a fresh, modern look or if the wood is damaged, painting is the better option.
How Can I Refresh My Old Kitchen Cabinets?
To refresh old kitchen cabinets, start by cleaning them thoroughly to remove grease and dirt. Next, consider sanding the surfaces to create a smooth base for painting or staining. Choose a high-quality paint or stain in a color that complements your kitchen. Apply a primer if painting, then follow with at least two coats of your chosen finish. For a more modern look, you can also replace hardware or add new features like open shelving. Finally, ensure proper drying time between each step for the best results.
How Do I Properly Prepare Cabinets for Updating?
To properly prepare cabinets for updating, start by removing all items and hardware from the cabinets. Clean the surfaces thoroughly to eliminate grease and dirt. Sand the surfaces lightly to create a smooth base for paint or stain. Fill any holes or imperfections with wood filler and allow it to dry. Finally, wipe down the cabinets with a damp cloth to remove dust before applying your chosen finish.
